Thinking about installing or replacing a pendant light can feel daunting, especially when it comes to wiring it safely. The key is understanding the proper steps to ensure everything is connected correctly and securely.
By following some simple precautions and instructions, you can make the process straightforward and safe. Keep reading to learn how to wire your pendant light properly from start to finish.
Shut Off Power and Gather Pendant Light–Specific Tools
To safely work on a pendant light, you need to shut off the power at the circuit breaker for that fixture; just flipping the switch isn’t enough because it doesn’t guarantee the fixture is de-energized. Start by locating the correct circuit breaker in your electrical panel and turn it off. If the breaker labels are unclear, take the time to identify the proper circuit before beginning the work. Next, grab a voltage tester—this is essential to confirm the power is truly off. Test the wires in the ceiling box to ensure there’s no voltage present, and repeat the test if needed for certainty. Use a stable ladder to reach the fixture safely, and place a warning label on the panel or switch to prevent others from accidentally flipping the breaker back on. Support the pendant while removing the canopy, but never assume the circuit is dead until you’ve verified it yourself. Before connecting any wires, follow the same safe wiring tips used for ceiling fans to ensure a clean and secure installation. For example, reversing the ceiling fan direction each season helps maintain energy efficiency, just as careful wiring ensures safety.
Take Down the Old Fixture Carefully
To take down the old fixture carefully, start by removing the bulbs and any fragile parts first. Let hot bulbs cool completely to avoid burns. Then, unscrew shades, globes, or crystals, placing these on a soft surface or wrapping them to prevent breakage. Keep small parts grouped together in a container or bag.
Support the fixture firmly with one hand before loosening any mounting hardware. Depending on your fixture type, the canopy may be held with canopy screws or a center locknut. Keep one hand steady on the canopy while removing the final fastener. Gently lower the fixture to avoid straining the wires inside. If the fixture is heavy or bulky, enlist a second person to help manage its weight safely. Place a towel or drop cloth underneath to catch any falling parts or debris. Hold the fixture with both hands during the last removal step to prevent sudden drops or damage. You may need to disconnect the wires using push-in connectors or other types, and if the previous fixture was a recessed light, you should check the housing removal steps to safely access the junction box. Always keep small parts safe during disassembly to avoid losing screws, tabs, or other hardware. For ceiling-mounted fixtures, verify that the electrical box is securely attached to a ceiling joist before proceeding with the new installation.
Label Live, Neutral, and Ground Wires Before Disconnecting
Label the live, neutral, and ground wires before disconnecting anything. Since wire colors can be misleading in older or altered installations, it’s essential to identify each conductor carefully. Use a voltage tester to confirm which wire carries current—don’t rely solely on color coding. Mark each wire with tape, labeling them as L for live, N for neutral, and G for ground. This step helps prevent confusion later, especially when you’re focused on tasks like painting or fixture cleaning. In polarized fittings, the live wire should connect to the socket’s center contact. Ground wires are generally bare copper or green; be sure to label them, even if they seem obvious. Keep the labels attached until the new fixture is fully wired. Proper identification now avoids headaches during reassembly, particularly in crowded electrical boxes where wires can get tangled or confused. For wall sconces, always double-check the mounting bracket orientation to ensure the fixture sits flush against the wall. For a clean DIY finish, always match wire labels to the corresponding terminals on your new fixture. Before wiring, ensure you have the correct replacement unit that fits your existing housing and trim size, as recessed can lights require precise measurements for a secure installation.
Wire the New Pendant Light Correctly (Brown to Live, Blue to Neutral)
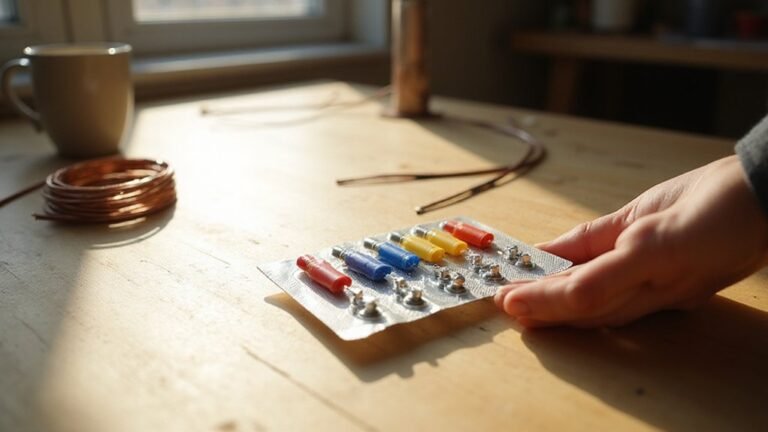
Ensure you wire the pendant correctly by connecting the brown wire to live and the blue wire to neutral. Do not connect the brown wire into the permanent live loop unless your specific wiring plan calls for it. Before tightening each terminal screw, confirm that the conductor seats are fully engaged. After securing the connections, gently tug each wire to test that it stays firmly in place and won’t loosen over time. Keep exposed copper to a minimum to reduce the risk of short circuits. Always verify that the color coding matches your labels, as incorrect wiring can lead to serious electrical faults. For a seamless upgrade, consider reviewing comparisons of top LED retrofit kits to ensure the fixture matches your recessed lighting needs. To improve visibility during the installation, adjust your work area’s lighting to brighten your photos of the wiring steps for later reference. If you need to remove an existing connector, use a push wire connector release tool or a small screwdriver to depress the release slot while pulling the wire gently.
Secure the Bracket, Tuck Wires, and Hang the Fixture
Tuck the wires neatly into the ceiling box, ensuring conductors remain untangled and away from sharp edges or screw heads. Leave enough slack to make safe connections, but avoid excess length that could prevent the canopy from sitting flush against the ceiling. Use any supplied strain relief to secure the pendant cable properly. For a secure hold, use twist on wire connectors after stripping the wires to the recommended length. A similar method of using a microfiber cloth can help keep ceiling fan blades free of dust buildup between deep cleanings.
Lift the canopy over the bracket and tighten its retaining screws evenly. Check that the fixture hangs straight and that there are no gaps between the canopy and the ceiling. Your pendant light is now securely mounted and looks clean and professional.
What If the Light Doesn’t Work? Quick Troubleshooting Tips
Starting with bulb troubleshooting is your best first step. Swap in a known-working bulb and make sure it is fully seated in the socket. Avoid touching the glass part with bare fingers because skin oils can create hot spots that shorten the bulb’s lifespan and affect performance. If replacing the bulb does not resolve the issue, check that the pendant light DIY kit includes all necessary components like the canopy, cord, and socket for a complete assembly.
Next, check for common electrical faults at the breaker panel. Confirm that the correct circuit breaker is turned on and that the wall switch controlling the fixture functions properly. Use a voltage tester—preferably one that measures actual voltage, not just a non-contact detector—to verify that power is reaching the fixture. If voltage is present, inspect the wire nuts connecting the wires; tighten any loose connections and look for signs of corrosion. When tightening connections, always twist clockwise to ensure a secure mechanical grip on the joined wires.
Also, look for visible damage such as frayed wires, burn marks, or melted components. If the socket contact tab appears misaligned, gently bend it back into place. Be cautious—if you smell burning or see signs of melting, these could indicate overheating problems that require professional attention. In such cases, escalate the issue to an electrician, especially if you suspect upstream faults or need to open up walls. Never take risks with electrical shocks or fire hazards.