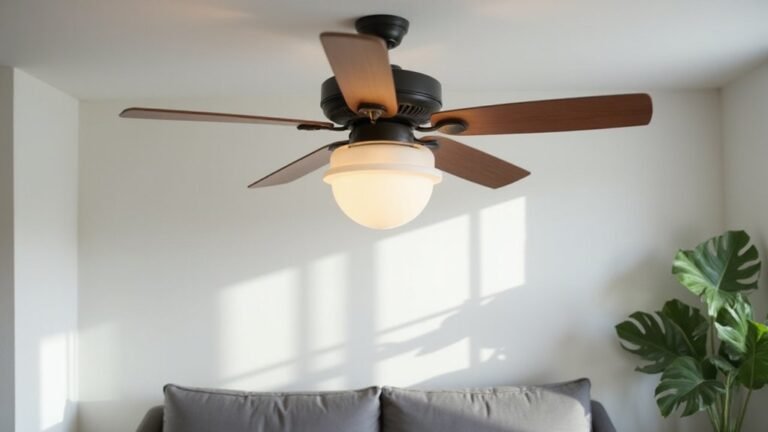
Ever wondered which way your ceiling fan should spin to keep you comfortable all year round? The direction makes a real difference in how your fan cools or heats your space.
By adjusting the rotation, you can improve energy efficiency and comfort without extra effort. Here’s what you need to know to get it right through every season.
How Ceiling Fan Direction Cuts Energy Costs Year-Round
Switching your ceiling fan direction seasonally is a simple way to cut energy costs year-round. In summer, set your fan to rotate counterclockwise. This creates a downward cooling breeze that makes you feel cooler, allowing you to raise your thermostat about 4 degrees. As a result, you can save up to 30 percent on cooling costs. For a safe installation, always start by turning off the power at the breaker.
During winter, switch to clockwise rotation at a low speed. This redistributes trapped warm air near the ceiling, helping even out the room temperature. By supporting a thermostat drop of about 2 degrees, you can reduce your heating bills by 15 percent or more. For a secure and stable installation, always use a ceiling fan brace to prevent wobbling or sagging over time. Color temperature also plays a role: warmer bulbs evoke cozy winter vibes, while cooler tones enhance summer’s fresh air feel. The design of your fan blades matters too—steeper pitches move air more effectively. When you adjust each direction, pair it with a slight thermostat change to maximize comfort and savings without sacrificing either. Don’t leave your fan unused; seasonal adjustments ensure it works for you all year long. For proper air movement, always select the correct fan size for your room’s dimensions.
Summer vs. Winter: Which Direction to Use and Why
To make your ceiling fan work efficiently in both summer and winter, you need to switch the rotation direction accordingly. For summer, set your fan to spin counterclockwise. This blade rotation creates a strong downdraft, producing a wind-chill effect that cools your skin. You’ll feel cooler without lowering the room’s temperature, which allows you to raise the thermostat setting by a few degrees while staying comfortable. For greater convenience, you can control the fan’s operation using a Kasa Smart Plug connected to Alexa. In winter, reverse the fan’s rotation to clockwise and run it on low speed. This gentle updraft pulls cool air upward and pushes warm air that’s near the ceiling back down along the walls. This process helps distribute heat more evenly without creating a noticeable draft on your body. It’s an energy-efficient way to enhance heating, but keep in mind that the airflow should remain subtle and indirect for the best results. The correct setting for each season optimizes both comfort and energy savings. For outdoor decks, consider pairing your fan with top solar lights that provide efficient illumination without increasing electricity costs.
How to Check Your Ceiling Fan’s Direction in 10 Seconds
Feel for airflow—if you notice a strong downward breeze, your fan is set to rotate counterclockwise, ideal for summer cooling. If there’s little to no direct airflow, it’s on the clockwise winter setting. For a quick visual check, hold a tissue strip beneath the fan; if it flutters downward, the fan is blowing air down. If the tissue stays still or moves upward slightly, the fan is pulling air up, indicating the opposite direction. This quick test takes less than ten seconds and gives you an immediate, reliable way to verify your fan’s current setting without guesswork. If you plan to replace a light fixture in the same space, ensure you select a compatible conversion kit designed to maintain proper airflow balance. For safety during any wiring changes, use wire connectors to secure all electrical connections properly. When converting any integrated lighting, always use approved LED retrofit components to ensure safe and efficient operation with your fan’s existing housing.
How to Change Your Ceiling Fan’s Direction Safely
To change your ceiling fan’s direction safely, start with a complete stop. Turn off the fan and wait until the blades have fully stopped rotating. Use a sturdy stool to reach the motor housing comfortably without stretching or risking a fall. Locate the reversing switch, which is typically a small slider found at the base of the fan or near the downrod. Once found, slide it to the opposite position to change the direction. If your fan is operated by a remote, press and hold the reverse button until the indicator blinks. This reversed airflow redistributes warm air efficiently during winter, reducing heating costs.
While the fan is still off, it’s a good opportunity to clean the blades and check for balanced operation to prevent wobbling. After switching the direction, step back to avoid accidental contact and restore power. Turn the fan on at a low speed first to ensure the new direction is functioning properly.
When to Switch: Seasonal Timing for Fan Direction
Switch your ceiling fan’s direction promptly at the start of each season—counterclockwise in warm weather and clockwise in cold. This adjustment ensures optimal airflow and comfort. Don’t wait until you feel uncomfortable; change it as soon as you need cooling or heating consistently. In summer, a counterclockwise setting creates a wind chill effect that evaporates sweat, making you feel cooler. In winter, a clockwise setting on low speed gently pushes trapped heat from the ceiling into the room without creating a draft. Set a calendar reminder to remember the switch, and avoid making changes mid-season, as timing it at the start maximizes efficiency and comfort. For floor lamps used nearby, pairing them with energy-saving LED bulbs can further enhance room lighting while reducing electricity costs. Consider low profile recessed can lights as an alternative for even, space-saving illumination that complements your fan’s air movement. Properly timed adjustments help your fan work with your heating and cooling systems, not against them. If you are replacing an old unit, ensure power is off before handling wiring to prevent electric shock.
How Much Can Ceiling Fan Direction Save on Energy Bills?
Properly adjusting your ceiling fan direction can significantly lower your energy bills. During summer, setting the fan to rotate counterclockwise at high speed creates a wind-chill effect that makes you feel cooler. This allows you to raise your thermostat by about 4°F without sacrificing comfort, potentially reducing cooling costs by up to 30%. Keep in mind, the fan itself reduces the workload on your air conditioner, so you don’t need to upgrade to more energy-efficient lighting to see savings. If you want to automate fan control, consider using a smart plug that turns the fan on and off based on room occupancy. For a safe installation, always follow the proper wiring connections outlined in the ceiling fan wiring guide.
In winter, switching the fan to clockwise at low speed recirculates warm air trapped near the ceiling, improving room ventilation. This helps distribute heat more evenly and can decrease your heating demand, lowering utility bills by around 15% or more. To maximize these savings, pair fan direction adjustments with thermostat management and ensure you leave the room occupied when the fan is running. Direction alone won’t cut costs if you don’t use it smartly. Before making any adjustments, check the recessed lighting wiring to ensure the fan is safely connected to the existing electrical box.
Pairing Fan Direction With Your Thermostat for 4°F Savings
A counterclockwise downdraft creates a cooling breeze in summer, allowing you to raise your thermostat by about 4°F without sacrificing comfort. This wind-chill effect makes you feel cooler without changing the actual room temperature. To maximize savings, run the fan on a higher setting during cooling season. A well-balanced fan blade design helps minimize noise while boosting airflow. To verify proper rotation, stand underneath the fan—you should feel a distinct downward breeze. Before switching modes, always turn the fan off, then use the toggle or remote to shift it to counterclockwise. Restart at the normal cooling speed. This method allows your HVAC system to work more efficiently, with your fan managing comfort per degree rather than solely relying on temperature. Not all fans have reversible motors, so check this feature before purchase. Proper installation and use of a fan can also affect your track lighting load if the same circuit powers both fixtures. For optimal outdoor placement, consider whether the fan will be exposed to moisture, as wet-rated fixtures are essential for lasting performance. Just as with ceiling fans, the actual lifespan of LED downlights can be shortened by operating them in excessive heat or moisture.
Don’t Make These Ceiling Fan Direction Mistakes
Always stop your ceiling fan completely before reversing its direction. Changing the direction while the blades are spinning can cause motor damage and pose a safety risk. Instead, turn off the fan entirely, wait a few seconds to ensure it has fully stopped, then flip the switch to change direction. Remember, the switch label varies by brand, so don’t rely solely on it. Instead, look up at the blades: if they move from right to left, the fan is set for summer cooling; if they move from left to right, it’s winter mode. After installing a ceiling fan, use a sturdy ladder to access the housing safely—clear any furniture below to prevent accidents. Different blade materials like wood, metal, or plastic respond differently to speed adjustments: low speeds in winter gently circulate warm air without creating drafts, while high speeds can feel uncomfortable. Conversely, summer mode requires higher speeds to produce a cooling breeze. If your fan is controlled via remote or app, check the settings visually after each switch to confirm the direction is correct, ensuring you maximize comfort and energy efficiency.
Best Ceiling Fan Direction for Every Room
For most rooms, setting your ceiling fan to rotate counterclockwise in summer creates a cooling breeze, while switching to clockwise at low speed in winter helps push warm air down without causing drafts. In living rooms and larger spaces, this dual orientation maximizes comfort across seasons and reduces energy costs. In bedrooms, keep the fan rotating counterclockwise during warm months to promote airflow, but in winter, switch to clockwise on low to prevent direct drafts that could disturb sleep. Running the fan on low in winter also decreases noise levels at night, enhancing sleep quality.
For kitchens and offices, a counterclockwise setting during warm days helps promote cooling, while a clockwise, low-speed setting recirculates heat in cooler months without disturbing papers or spoiling food. When installing a ceiling fan, always position it at the center of the room for even airflow, leaving at least 30 centimeters from walls. Match the fan’s diameter appropriately to the room size—up to 132 centimeters for larger areas—to ensure optimal circulation and efficiency. These directional adjustments help you stay comfortable and conserve energy year-round.
Ceiling Fan Direction FAQ: Answers to Common Questions
You should set your ceiling fan to spin counterclockwise during summer, creating a cooling downdraft. In winter, switch the direction to clockwise at low speed to circulate warm air near the ceiling without causing a chilly breeze. To check the direction, stand underneath the fan: if the blades spin counterclockwise, you’ll feel airflow; if they spin clockwise, you won’t. Always use the motor housing toggle switch to change direction and turn the fan off first to avoid damage. The material of your fan blades also affects maintenance—wood blades can warp over time, while metal blades are more durable. Keep in mind that fans do not lower room temperature; they only improve comfort through air movement. In winter, use low speed to minimize energy use while maintaining circulation. For a decorative upgrade, consider adding chandelier crystals to the fan pulls or light kit.