Figuring out how to design landscape lighting can be tricky, especially when you want it to look natural and inviting after dark. Getting it just right involves more than picking pretty fixtures—it’s about planning your layout carefully to avoid glare, over-illumination, and dark spots.
By observing your property at dusk, you can identify problem areas and plan a balanced, effective lighting system. The full guide below will walk you through the steps to create a stunning landscape lighting layout that works seamlessly at night.
Conduct a Dusk-to-Dark Site Assessment First
Conducting a dusk-to-dark site assessment is essential before designing any landscape lighting. You need to observe and record the night sky condition on your property after sunset, when spill light and glare from artificial sources become visible. Use an illuminance meter to measure light intensity on the ground at consistent intervals across different areas. Vertical readings taken at 1.5 meters help evaluate the impact on neighboring receptors, such as homes or natural habitats. Inventory all existing fixtures, noting details like their age, mounting height, aiming direction, and color temperature. Also, record environmental conditions like moisture buildup, which can influence light performance and fixture longevity. Identifying sensitive receptors helps you understand where light pollution is already high or lacking. This baseline assessment guides your dark-sky design approach, emphasizing features like full shielding and zero upward light to minimize skyglow and maintain a dark night environment. Adjusting fixture angles downward mimics the correct ceiling fan direction for summer, pushing light down where needed instead of scattering it outward. A hanging pendant light uses a similar downward orientation to concentrate illumination on a specific surface beneath the fixture.
Sketch Your Property and Mark Every Fixture Location
Sketch your property and mark every fixture location. Start by creating a scaled drawing using graph paper or a rough sketch. Include your house footprint, hardscape features like patios or walkways, and major plantings. On the drawing, mark the approximate position of each fixture, then place small flags on the ground to indicate these locations.
Label each fixture type with clear symbols, such as a circle for path lights or a square for spotlights, using a consistent symbol system throughout the plan. Measure the distances between fixtures and from fixtures to the transformer; recording these measurements helps you estimate wire runs accurately.
Divide your property into zones based on function or location, such as entryways, entertaining areas, or security zones. Creating separate plans for each zone or transformer can simplify installation, especially on larger properties. Note viewpoints from critical sightlines—street, patio, or interior rooms—to ensure your fixture placement aligns with your desired views and lighting effects. Downlighting creates a moonlight effect when fixtures are elevated and directed downward. Using the correct wire gauge prevents voltage drop and ensures consistent brightness across all fixtures. Always choose a transformer with sufficient wattage capacity to support all connected fixtures without overloading. Unlike indoor units, outdoor fixtures must be rated for weather resistance to handle moisture and temperature extremes.
Mount the Transformer Near a GFCI Outlet, Hidden From View
Mount the transformer near a GFCI-protected outdoor receptacle to ensure reliable low-voltage power and maintain safety standards. Ideally, choose a receptacle rated for wet locations and protected by a cover, which helps keep the unit out of direct exposure to rain and snow. Place the transformer behind shrubs, within a recessed outlet, or behind an access panel to keep it discreet and prevent it from detracting from your landscape’s appearance.
Elevate the transformer at least 12 inches above ground level to shield it from rain splash and snow accumulation. Avoid fully enclosing the unit; leave space for easy inspection and unplugging. Always disconnect the transformer before wiring low-voltage cables, and only plug it in after completing all connections. If a suitable GFCI outlet isn’t nearby, consider routing from an attic or wall cavity to a discreet, code-compliant outlet location. For a robust setup, choose a transformer with a durable swing arm to allow flexible lamp positioning while maintaining a tidy appearance. Proper placement ensures accessible maintenance while keeping the setup tidy and safe. For a clean finish, follow safe wiring tips such as securing all low-voltage connections with waterproof wire nuts and verifying polarity before tightening. When mounting, avoid exceeding the transformer’s maximum wattage capacity to prevent overheating and ensure long-lasting performance.
Place Path Lights, Uplights, and Accent Lights by Function
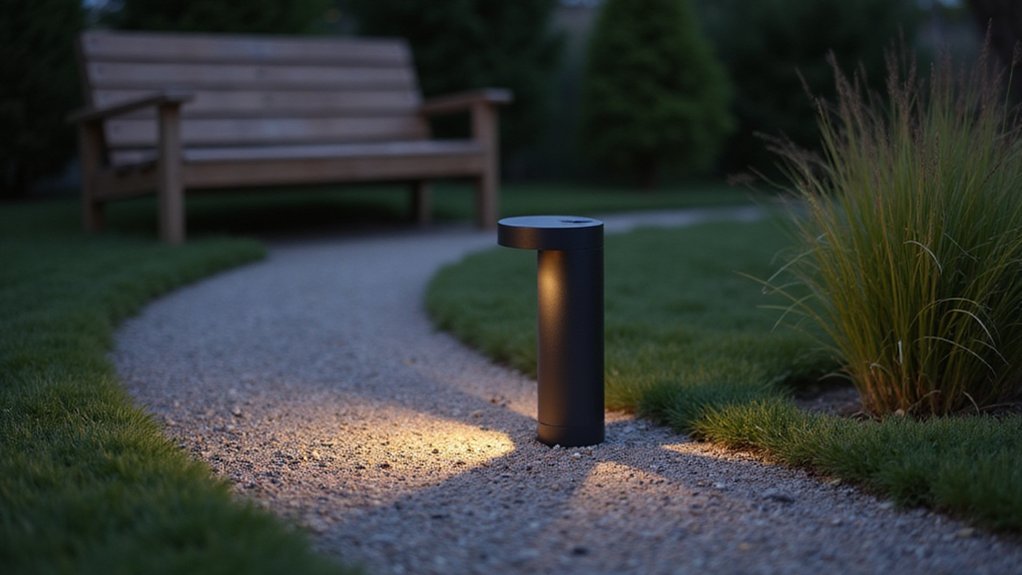
When placing path lights, uplights, and accent lights, use each fixture’s primary function to guide your layout. Path lights should focus on illuminating safe footing; position them about 6 inches behind the walkway edge, spaced every 6 to 8 feet. Stagger these fixtures in a zigzag pattern to create a visual rhythm and minimize glare by keeping the light below eye level. Uplights are designed to emphasize vertical features like trees or walls. Place them based on the size of the object and the beam angle, aiming to reveal texture or trunk details without overwhelming the scene. The goal is to achieve contrast and visual interest rather than uniform brightness. For a high-quality outdoor setup, consider matching your fixture choice with the same attention to top living room ceiling fans for performance and durability. Accent lights target focal points such as sculptures or entry features. Use these sparingly, with lower lumen output, to highlight specific areas subtly. Be mindful to avoid casting unwanted shadows on pathways. By combining path lighting for navigation, uplighting for vertical emphasis, and accent lighting for focal points, you’ll create a balanced and inviting landscape ambiance. This layered approach ensures that each fixture’s primary function is preserved, preventing the common mistake of over-illuminating a single zone. For a softer effect, consider using shielded fixtures to direct light precisely where it is needed.
Plan Wire Runs and Estimate Cable Gauge for Your Layout
Before running any cable, create a scaled sketch of your property that marks each fixture, landscape feature, and transformer location. Measure the exact path of each cable run, including turns and vertical changes like hills or steps. Group fixtures into zones based on distance to make routing simpler. For larger systems, split the layout into multiple runs, keeping each under 100 to 150 watts or within 50 feet of cable, and limit each run to no more than eight fixtures. Using a daisy chain layout from the transformer is preferred for LED systems due to simpler troubleshooting, as wire runs connect sequentially from one fixture to the next. For battery-powered or portable LED strips, consider using a rechargeable battery pack to ensure consistent power without wired connections. Follow recessed lighting spacing guidelines to maintain uniform brightness across your yard.
When choosing cable gauge, remember that lower numerical sizes mean thicker wire. Use 16-gauge for short runs around 60 feet at up to 60W. For runs up to 100 feet, opt for 14-gauge wire. For longer distances around 200 feet, 12-gauge is better. For very long runs up to 300 feet, go with 10-gauge cable. Calculate the total wattage of all fixtures on each run, then select a transformer rated at 80 percent of your total load to allow for headroom and reduce voltage drop. A universal remote control can simplify adjusting your landscape lighting zones from indoors.
Follow Spacing and Aiming Rules for Low-Voltage Landscape Lighting
To achieve effective low-voltage landscape lighting, fixture spacing and aiming are critical. For pathways, keep fixtures 6 to 8 feet apart and stagger them on alternating sides to avoid creating harsh, uniform runway lighting. Accent lights should be spaced based on feature size: small features need 3 to 5 feet between fixtures, while larger objects like trees may require 10 to 15 feet depending on the beam spread. For safety, install step lights every 3 to 5 feet or one per 1 to 2 steps. Wall wash lighting should have fixtures placed 5 to 8 feet apart to ensure even coverage. When aiming fixtures, overlap pools of light to eliminate dark spots, hide fixtures behind shrubs for a cleaner look, and always aim beams at the subject rather than directly into sight lines to prevent glare. Remember, a little light often makes a bigger impact than over-illumination. For instance, using well lights for uplighting trees provides a dramatic effect while keeping the fixture hidden. For a clean DIY finish, you can use safe wiring tips to connect your low-voltage transformer to a Kasa Smart Plug for automated control via Alexa. Choosing the right ceiling fan for your outdoor living space can also enhance airflow, but it won’t replace the visual depth that proper lighting provides.
Test Your System at Dusk to Confirm Coverage and Aiming
Testing your system at dusk is essential to confirm its coverage and aiming. This is when beam spread, glare, and dark spots become most apparent. Walk the property to verify fixture placement and ensure uplights hit tree trunks instead of empty space. Path lights should thoroughly cover walking surfaces without gaps. Note any dim areas or blind spots and mark problematic fixtures with tape for adjustments later.
Focus on precise aiming. Make sure lights are not directed into windows or at eye level, which can cause glare or discomfort. Re-aim fixtures that cast glare or miss their intended targets, then confirm that each adjustment improves the scene’s overall appearance. Use a voltmeter at fixtures if brightness appears uneven, checking for voltage drops that could diminish performance. Finally, verify dusk-to-dawn sensors respond appropriately as ambient light declines, ensuring continuous operation without manual intervention. Conducting this dusk test helps you catch issues that daylight inspections might miss, saving you time and effort during final adjustments. For farmhouse-style spaces, matching the fixture’s finish to the home’s aesthetic can also ensure that the lighting design complements the overall decor.