If you’re wondering how to put together a pendant light from a DIY kit, you’re not alone. It might seem complicated at first, but with the right steps, you can easily install a stylish light fixture yourself.
You’ll need to handle wiring, secure your shade, and adjust the length for the perfect look.
In this guide, you’ll learn what’s included in a typical kit and how to use everything safely and correctly.
Keep reading to get all the details you need to wire and hang your pendant light with confidence.
What Exactly Comes in a Pendant Light DIY Kit?
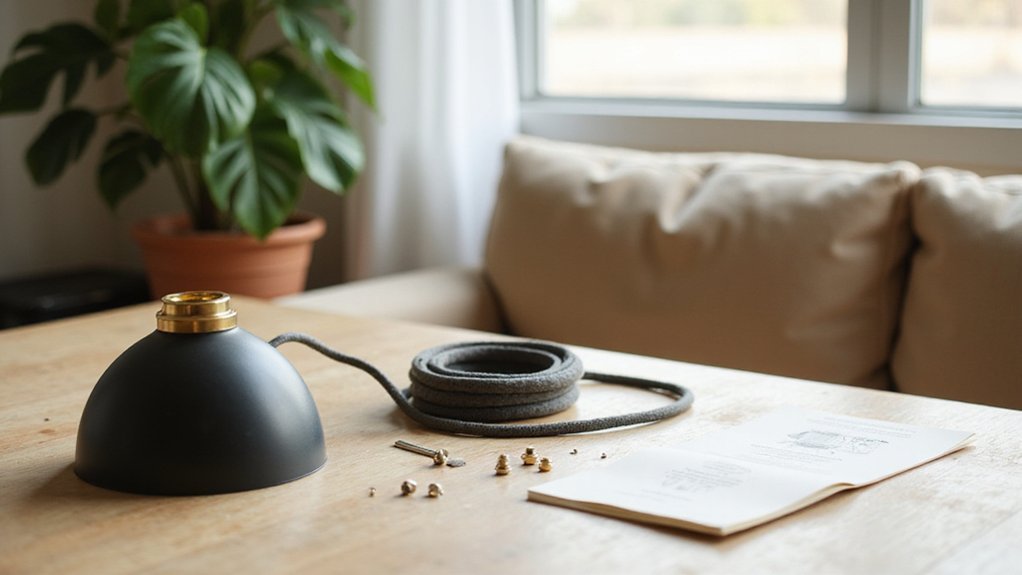
A pendant light DIY kit typically contains the essential electrical components needed for assembly. You will find a bulb socket designed for the lamp holder, along with a cord or cable, usually about one meter long, providing enough length for hanging adjustments. The kit also includes a ceiling canopy to cover the junction point where the fixture connects to the ceiling. To support and secure your assembly, a crossbar for mounting support and a threaded collar to lock your shade in place are provided. To optimize your room’s airflow after installation, remember that you should set the ceiling fan direction for the opposite season.
Most kits come with pre-wired assemblies that feature a two-core cable, which simplifies the wiring process. You’ll also receive cord grips and fastening pieces to secure each component safely. However, decorative elements such as light bulbs, shades, or other embellishments are not included and are meant to be selected separately according to your design vision. Clear wiring instructions are included to guide you through safe and correct connections, emphasizing electrical safety.
For a truly custom shade, you can craft one yourself from gypsum-coated textile shaped over a cylindrical form, much like the technique used in designer DIY projects.
What Tools You Need to Assemble Your Pendant Light Kit
You’ll need a handful of basic tools beyond the items included in the box to assemble your pendant light safely and effectively. Start with safety essentials: a non-contact voltage tester to ensure the circuit is dead and safety glasses to protect your eyes during installation. A sturdy ladder is necessary to reach the ceiling box comfortably.
For wire preparation, gather wire strippers and cutters. These tools help you remove insulation and trim wires to the proper length. A flathead and Phillips screwdriver are essential for securing screws and connectors. Electrical tape provides a secure and insulated connection for wiring. To ensure a safe installation, always use a non-contact voltage tester to confirm power is off before touching any wires. Following the same safe wiring tips used for ceiling fans can help you avoid common mistakes during installation.
A drill equipped with various bits becomes handy if you need to install new anchors or move the mounting point. A level ensures the fixture hangs straight, which is both functional and aesthetically pleasing. Pliers are useful for gripping hardware, especially when tightening or adjusting; an adjustable wrench can help if your junction box screws don’t match your fixture fittings.
Be aware of the type of light bulbs your fixture requires since wattage limits are important for safety and function. Chain kits may require additional tools for link adjustments, while cord kits primarily involve wire prep. Always refer to your manufacturer’s instructions for specific tools and steps needed for your pendant light kit. Using 3 way wire connectors can help you achieve a clean and secure wiring setup when connecting multiple wires in the junction box.
How to Assemble the Socket, Canopy, and Shade Holder
To assemble the socket, canopy, and shade holder, follow a clear step-by-step process. Begin by threading the socket body onto the cap until it locks securely in place. Tighten the cord grip snugly to ensure stability. If your socket design includes a bayonet plug, connect this component before positioning the canopy. For a safe and clean finish, always verify the wire gauge matches the fixture’s rating before starting assembly. Before connecting any wires, remember to turn off the power at the circuit breaker for safety. If you are upgrading from a pull-chain model, you can install a remote control receiver to add wall-mounted convenience.
Next, for shade compatibility, slide the shade onto the cord after completing the socket assembly. Secure it from underneath with a socket ring or retaining nut, making sure it sits evenly and securely. This method works for both homemade and commercial lampshades, as the spider fitting is a common standard for US lampshades. Feed the pendant wires through the canopy, then attach the mounting plate to the junction box.
Align the canopy to the mounting plate and secure it with canopy screws. Before pushing the wires fully inside the junction box, make sure they are tucked in neatly to avoid pinching or damage. Push the wires fully inside and then bring the canopy flush to the ceiling.
Once the canopy is in place, reattach any decorative socket parts if applicable. Finally, tighten all fasteners firmly to keep everything secure and safe.
Set the Cord Length and Shade Height Before Installation
Before installation, you need to set the cord length and shade height precisely to ensure your pendant hangs at the desired height and the canopy sits flush against the ceiling. Begin by loosening the cord grip or strain relief with a small screwdriver, but do not remove the screw entirely—just loosen it enough for the cord to move freely. Measure the distance from the ceiling to your preferred hanging point to determine the correct height. To ensure safety before starting, you must turn off power before working on any wiring components. For a low profile installation, the canopy should sit flush against the ceiling without gaps. Smart plugs can also help monitor energy usage of connected lights, but be mindful of safety limits like maximum amperage ratings to avoid overheating.
Next, slide the canopy and cord through the adjuster until you reach that measured drop. Once in position, tighten the screw to lock the cord in place, but be careful not to overtighten, as crushing the cord can damage it. If your fixture uses a ceiling cup, pack any excess cord loosely to prevent heat buildup. Some kits come with a plastic retainer to secure the retracted wire and keep it neat.
Finally, verify that the canopy sits flush against the ceiling and the shade hangs level before proceeding with the rest of the installation.
Install Your Pendant Light Kit: Ceiling Wiring or Plug-In Setup
To install your pendant light kit, you have two options: hardwire it into your ceiling junction box or use the plug-in setup. For hardwiring, start by turning off the breaker, then test the wires with a voltage meter to ensure power is off. Match the black wire to the black, white to white, and ground to ground. Make sure all splices are tucked safely inside the junction box to prevent any contact or fire hazards. This method provides a flush, secure fit and is ideal if you want a permanent installation, but your ceiling must be compatible with existing wiring. Always confirm that all wiring is fully disconnected before proceeding with removal of any existing fixtures.
Choosing the plug-in option is simpler. First, mount the ceiling hook or bracket using appropriate anchors for your ceiling material. Route the cord to a nearby outlet and secure excess cord with the kit’s anchorage to keep it neat. Then, connect the internal color-coded connectors, ensuring they lock tightly in place. Check all hardware, tighten connections, and attach the shade and bulb last. Before starting either method, always inspect supply wires for damage to ensure safety.
Hardwired vs. Plug-In Pendant Light Kits: Which to Choose?
Hardwired pendant light kits are the best choice when you want a permanent, seamless look. They connect directly to your ceiling’s electrical wiring, resulting in a built-in fixture with no visible cords. This setup is ideal for owned homes or renovations where you want a polished, fixture-like appearance. Because they are wired directly into the ceiling, hardwired kits generally provide a more secure and tidy installation. They also tend to offer more variety in materials and finishes, giving you extensive design options that blend smoothly with your space. Unlike plug-in systems, hardwired pendants typically use integrated LED modules or sockets compatible with high-quality bulbs, which can maximize the lifespan when paired with proper ventilation and dimmer switches. For users who also incorporate LED strip lighting in their space, it is critical to follow a safety guide before cutting any strip to length. However, if your fixture stops responding, you may need to perform a factory reset to restore normal operation.
Plug-in pendant light kits draw power from a standard wall outlet and hang from a ceiling hook. They are perfect if you prefer flexibility or are renting, as you can move them easily without any electrical work. Installation is simple—just plug them in, hang, and add a switch for control. They are a good solution when you need temporary lighting or expect to relocate the fixture frequently. Overall, choose hardwired for a permanent, clean look, or go with plug-in if you want versatility and easy setup.
Common Mistakes to Avoid When Building a Pendant Fixture
Once you begin assembling your pendant fixture, electrical safety is paramount. All splices must be enclosed inside a rated junction box to prevent fire and shock hazards. Avoid leaving exposed connectors under the mounting bracket, as these can be dangerous. If your fixture requires multiple conductors, use a 3-port connector to keep connections secure and contained. Properly managing electrical connections reduces the risk of shorts or failures that could compromise safety or fixture performance. Always turn off power via circuit breaker before starting, as this prevents accidental energization during installation. Additionally, ensure that any painted surfaces on the mounting hardware are fully cured and non-conductive to avoid creating unintended electrical paths. For secure splices, practice clean wire twisting to hold conductors firmly before capping them. If you are unsure about the load capacity of your ceiling, check the weight rating of the junction box to ensure it can support your fixture.