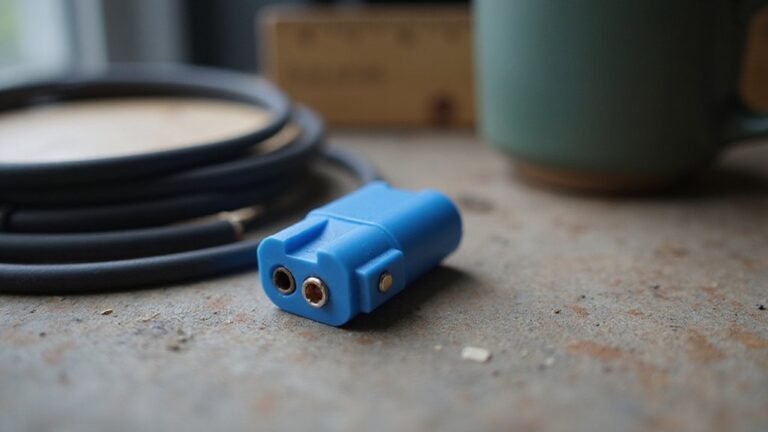

Ever wonder how to connect wires safely and securely? Getting the connections right is crucial for safety and function, whether you’re fixing an outlet or installing new fixtures.
By following a few simple steps—like turning off power, selecting the right connector, and making tight, secure connections—you can wire confidently.
The rest of this guide walks you through the full process, so you can do it right the first time.
What Exactly Is a Wire Connector: and Do You Really Need One?
A wire connector, also called a wire nut, is a small, twist-on device used to join two or more copper wires securely. It is essential for a safe, code-compliant electrical connection. Bare wire twists alone do not provide the necessary mechanical security or electrical insulation. A connector ensures both by gripping the wires tightly and preventing exposed copper from causing shorts or faults.
Connection types vary, but color coding helps you choose the right one. Gray connectors are suited for small gauge wires, while red connectors are designed for larger bundles. The internal metal coil grips the stripped wires when twisted on, pulling them tight to form a reliable connection. Leaving wires unsecured or skipping connectors can lead to loose contacts, arcing, or electrical faults. Therefore, it’s crucial to always use the correct connector size and type for every splice inside an electrical box. For recessed can lighting installations, you must also consider proper junction box clearance to ensure safe and compliant wiring. Similarly, when installing a ceiling fan, adjusting the blade rotation direction seasonally can improve energy efficiency and comfort. When wiring LED light strips, always cut along the marked cut lines to avoid damaging the internal circuit.
Gather the Right Tools for Wiring Connectors
Once you’ve selected the appropriate wire connector for your splice, you’ll need specific tools to prepare and secure the connection properly. Start with wire cutters to make clean, precise cuts that prevent frayed or uneven ends. Use wire strippers to remove insulation without nicking or damaging the conductor beneath, ensuring a strong electrical flow. Pay attention to tool ergonomics—comfortable grips reduce fatigue, especially during repetitive crimping or stripping tasks. When working with crimp connectors, ratcheting crimp pliers are essential for applying consistent force, resulting in secure and reliable connections. Measuring the correct wire length and choosing the right size of connector are also critical steps to prevent future connection issues. For simpler jobs, these quick splice terminal blocks require no crimping and support easy installation. When wiring a ceiling fan and light, always follow safe wiring tips to ensure a clean and secure DIY finish. Before securing any splice, verify that the power is off at the breaker to avoid electrical shock hazards that can arise from a faulty connection. If your connection fails to work, a common solution is to learn how to reset a smart plug using specific button sequences to restore normal operation.
Strip Wires to the Correct Length for Your Connector Type
The correct strip length depends on the connector type, but generally, you should strip only enough insulation to fill the barrel without exposing excess bare copper. For wire nuts, this length is usually between 6mm and 13mm, ensuring the wire is securely contained without extra strands. Crimp terminals require stripping the conductor to exactly match the barrel depth specified by the manufacturer, which guarantees a proper crimp and reliable connection. Using the correct gauge setting on your wire stripper prevents damage to the wire integrity and ensures proper electrical contact. Additionally, when adapting recessed fixtures for pendant lights, ensure your stripped conductor length aligns with the conversion kit’s terminal requirements to avoid strain on the splice. Following the can converter recessed light kit guidelines ensures your stripped wires match the manufacturer’s design for a secure fit.
Always dry-fit the conductor into the connector first to verify that the bare wire fills the designated zone completely. Stripping too short may result in an incomplete connection, leading to loose mechanical retention and potential failure. On the other hand, stripping too long risks exposing strands that can cause shorts and reduce insulation support. Follow the exact specifications for your connector model rather than relying on generic or approximate lengths. For outdoor projects like hanging lights, verify that your stripped connections match deck wiring requirements for weather-resistant durability. Precise stripping is essential for making safe, dependable, and long-lasting electrical connections.
Match Your Wire Connector to Material, Gauge, and Application
Matching your wire connector to the material, gauge, and application ensures safety and proper function. Start by identifying the conductor material. Standard connectors are designed for copper wire only. If you’re working with aluminum, choose a connector specifically made for that material, such as an Al/Cu connector. Using the wrong type on aluminum can create hazardous, unreliable connections, so always verify compatibility first. When working near recessed lighting, ensure connectors are rated for the heat exposure common in such fixtures.
Next, check the wire gauge compatibility. Every connector has a specified range of acceptable wire sizes or diameters. Forcing a wire outside this range can lead to poor connections or damage. Twist-on connectors generally work with ranges like 22–16 AWG or 18–10 AWG. For larger solid wires above AWG 10, set-screw or crimp connectors provide better security.
Finally, match the connector type to your application. Use twist-on connectors for indoor residential wiring. Push-in connectors are ideal for quick, easy installs. For environments subject to vibration or movement, select crimp connectors for a more durable connection. Consider environmental factors such as moisture, heat, and vibration. For outdoor or underground work, waterproof or weatherproof connectors are essential to prevent corrosion and ensure safety. In settings with frequent temperature swings or long daily usage, these connectors help maintain consistent performance over time and avoid degradation.
Make a Secure Wire Connector With the Twist-On Method
To make a secure wire connector with the twist-on method, start by turning off power at the breaker and verifying de-energization with a non-contact voltage tester. Then, strip the cable insulation cleanly without nicking the conductor, matching the strip length to the connector’s specifications. Expose only the bare wire needed—too little prevents proper contact, while too much risks exposed copper. Use only approved, quality connectors, as cheap options lack the internal expansion gaps needed for a reliable connection. Additionally, selecting connectors rated for the specific number of wires reduces connection failures caused by overcrowding. Next, align the conductors side by side with the insulation ends even. Avoid crossing or fanning the wires; a uniform contact surface for the spring is essential for a solid connection. Place the twist-on connector over the stripped ends and twist clockwise until it feels snug. Continue twisting until the outside of the wire begins to turn with the connector—that indicates the connection is tight. Do not force additional turns, as over-tightening can damage the conductors. Finally, perform a tug test on each wire. A properly secured connection will resist slipping. Check for any exposed copper below the connector and ensure the connector sits straight without wobbling. Confirm that no strands protrude beyond the connector’s cap. Always match the connector size to the conductor gauge—oversized or undersized connectors compromise safety and reliability. For tasks like installing a ceiling fan remote, always follow safe wiring tips to ensure a clean DIY finish. A key visual check is verifying that no conductor strands are visible outside the connector after twisting, which confirms full internal engagement.
Use Lever-Lock, Push-In, or Crimp Connectors for Speed
Lever-lock, push-in, and crimp connectors offer fast, reliable wiring options. Lever-lock connectors use a simple lift, insert, and close motion, allowing you to wire efficiently without tools. Push-in connectors let you insert stripped conductors directly into terminals, making connections quick and straightforward. Both types are suitable for solid, stranded, and flexible wires. When troubleshooting a malfunctioning fixture, using a lever-lock connector can simplify temporary diagnostics by allowing quick reconnections. Crimp connectors require a crimping tool but create a permanent, vibration-resistant bond that’s ideal for high-stress environments. Always select connector materials that match your environment—brass, copper, or stainless steel—to ensure appropriate corrosion resistance. After installation, perform connection testing with a pull test to verify mechanical grip and use a multimeter to confirm continuity. For junction boxes or lighting fixtures requiring easy rework, lever-lock or push-in connectors save time. For permanent, vibration-prone setups, crimp connectors provide a secure, durable connection. Ensure your connector ratings align with wire size, conductor type, and voltage to prevent overheating or loose contacts. Push-in connectors also feature a built-in wire strip guide to ensure correct stripping length for solid wire.
Test Your Wire Connector and Spot Common Mistakes
Start with a visual inspection before trusting a connection. Look for bent pins, corrosion, loose wires, or incomplete seating, which can cause intermittent faults. Check both halves of the connector for pushed-out terminals and signs of heat damage. Corrosion or pin misalignment can hide behind a seated lock, so don’t skip this step. For reliable long-term performance, always ensure proper contact pressure within the connector. Always follow safe wiring tips such as turning off power at the breaker before inspecting any connector. You should also verify that the connector is rated for the appropriate current and voltage limits to avoid overheating.
Next, use a multimeter. Set it to continuity or ohms, then probe corresponding terminals on both sides of the connector. A beep or low resistance indicates a solid connection. For power circuits, measure voltage under operating conditions—poor grounding can make it seem like the circuit is dead when it’s not.
Finally, perform a wiggle test. Move the wires while watching the multimeter for flickers or changes in readings. Flickering signals reveal intermittent faults. Be careful not to force probes into terminals, as spreading contacts can cause future failures. Combining visual checks, continuity testing, and wiggle testing gives you a thorough diagnosis.
Double-Check Your Work Against Local Electrical Codes
Always double-check your work against your local electrical codes. Because local codes can override national standards, it’s essential to verify that your modifications meet your area’s specific requirements. Electrical permits are usually required for any work involving electrical changes; failing to obtain one can lead to fines or the removal of your work. Inspection procedures differ: rough-in inspections typically occur before walls are closed to ensure wiring is correctly installed, while final inspections verify that all connections are safe and compliant. For low-voltage projects like LED strip light installations, always verify that connectors and splices are rated for the specific voltage.
Your local building department is the primary authority to confirm which rules apply. If local regulations are stricter than the National Electrical Code (NEC), the stricter rules take precedence. Remember to account for energy codes and utility-specific rules, which may introduce additional requirements. For example, older panels or fuse boxes often do not meet current standards, so they might need upgrading. If you are uncertain about compliance, hiring a licensed electrician can save you time, ensure safety, and increase the likelihood of passing inspection. Always confirm that your work aligns with the edition of the code enforced in your jurisdiction to avoid surprises.