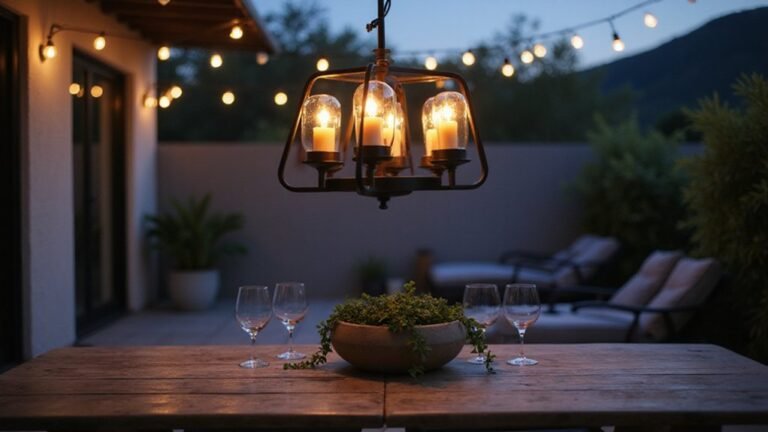
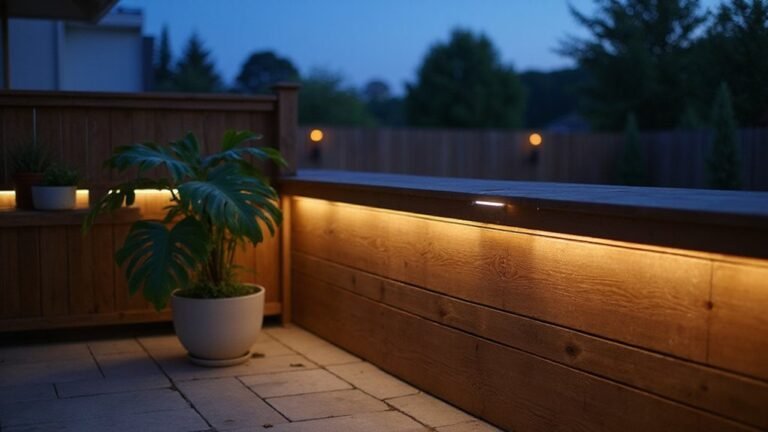
Wondering how to light up your outdoor space without it feeling cluttered or chaotic? Choosing the right landscape lighting can enhance your yard’s beauty, create safety, and set the perfect mood—all with a handful of well-chosen fixtures.
In this guide, you’ll learn about six key types of landscape lights, how to place them effectively, and what to consider for an easy, stunning setup.
Keep reading to discover what works best for your outdoor space.
The 6 Core Landscape Lighting Types You’ll Choose From
Spotlights or uplights are the most versatile for outdoor lighting. They use narrow beams under 80 degrees, focusing on features like trees, statues, or architectural elements. This creates dramatic effects, such as silhouetting, which highlights shapes against the sky or background. Uplights are especially effective for emphasizing vertical features and adding depth to your landscape. For indoor applications, you can achieve a similar focused aesthetic using wall sconce candle holders to highlight specific wall features or artwork.
Floodlights are broader, spreading light over 60 to 120 degrees, making them ideal for illuminating large areas like driveways, patios, or security zones. They provide ample coverage to prevent dark spots and improve safety around your home. When choosing between spotlights and floodlights, consider the scale of what you want to highlight or cover, as well as the mood you wish to create.
Both types of fixtures come with energy-saving options, such as LED bulbs or dimming capabilities. Adjusting the brightness helps create different atmospheres or conserve power, especially if you’re lighting large or multiple areas. Proper placement and beam angle selection ensure you get effective, targeted light without unnecessary spillage. Just as you would switch the ceiling fan to match seasonal needs, adjusting your landscape lighting’s intensity or direction seasonally can optimize both visual impact and energy efficiency throughout the year.
Low-Voltage vs. LED: Which Power System Fits Your Yard
Line-voltage 120V systems are generally better suited for larger security areas and require professional installation. They operate directly from standard household electricity, making wiring more straightforward but necessitating an electrician and permits. These systems use thick wires and higher voltage, which can pose a higher shock risk, especially around children and pets.
In contrast, low-voltage 12V LED systems are safer for everyday yard lighting because their lower voltage reduces shock hazards. They are easier for DIY installation, as wires can be buried shallowly without conduit, and transformers are simple to size—just match the wattage to your fixtures. LED fixtures also enable smaller transformers and less wiring overall, and quality fixtures with a minimum 10-year warranty are recommended to ensure long-term performance.
While line-voltage systems are more powerful for security lighting, low-voltage LED systems shine in accent lighting with flexible, safe, and energy-efficient options.
Spotlight or Flood Light? Which Beam Width Your Feature Needs
A beam angle of 10° to 45° is ideal for spotlights because it concentrates light on a specific area or object. This narrow focus creates sharp, intense highlights perfect for emphasizing features like statues, trees, or signs. The tighter beam also projects farther, allowing you to isolate a single object without spilling light onto surrounding areas. Choose a spotlight when you want to draw attention to one feature with precision. For a safe installation, always follow proper wiring methods to avoid electrical hazards and ground the fixture correctly.
Design Safe, Low-Glare Landscape Lighting for Paths and Steps
To ensure safety and avoid blinding glare, use low-glare landscape lighting for paths and steps. Choose fixtures that provide evenly distributed light without harsh bright spots. Hide the light source by installing shielded, downward-aimed fixtures to block direct view of the bulb. If you pair your lights with a smart plug like a Kasa model, you can easily reset and setup timers to avoid leaving them on accidentally.
Place lights on the inside of curves and stagger them from side to side rather than lining them straight; this softens the visual rhythm and reduces monotony. Space the fixtures about 6 to 8 feet apart so their light overlaps, eliminating dark gaps along the path. For steps, install linear lights underneath the lip to clearly illuminate each tread, helping users see where to step. Applying these same principles, you can adapt a can light conversion kit to create a recessed, glare-free effect for overhead path coverage.
Select warm color temperatures around 2700K to 3000K. This reduces the harshness of the light and creates a welcoming atmosphere. Keep lumen output between 50 and 100 lumens per fixture; higher brightness levels can create glare and defeat the purpose of subtle illumination. Your goal is to guide safely, not to spotlight each feature like a runway. When positioning fixtures, consider the same pendant light principles of hiding the source to maintain a clean, uncluttered visual effect.
Wall Wash Lights and Downlights: Soft Coverage for Large Surfaces
Wall wash lights are designed to provide an even, smooth coverage for large vertical surfaces. They should be placed about 2 to 3 feet from the wall, with fixtures spaced roughly the same distance apart. Using a wide beam angle—preferably between 45 and 60 degrees—helps cushion the light across the surface and reduces harsh shadows or hot spots. To further ensure safe, quiet operation, check that all fixtures are securely mounted and free from vibration or imbalance. For installations that involve adding a new switch or control, remember that a remote receiver must be wired correctly to avoid overheating or electrical issues.
Linear LED wall washers, ranging from 9W to 36W, are suitable for both residential and commercial exteriors. Increasing the wattage or adjusting the beam angle will improve coverage on taller walls rather than moving the fixtures farther away. This approach ensures a consistent light wash that enhances textures, colors, and architectural details without creating glare or uneven illumination. Proper fixture placement at one-third of the wall height from the surface ensures even coverage and optimal light distribution. Before installing any new fixture, always switch off the power at the circuit breaker to avoid electrical shock.
When to Hide Your Fixtures With Well Lights and In-Ground Options
Well lights and in-ground fixtures are ideal when you want the light source to be completely hidden. These flush-mounted units are discreet during the day, making trees, flagpoles, or facades the main visual focus at night without any fixture clutter. They are especially suitable for high-traffic areas where exposed lights could be damaged, as they can withstand mower strikes and other impact. Constructed with a solid brass top and heavy-duty composite bottom, these fixtures offer rust resistance for long-term durability in outdoor conditions. Many models are designed to be compatible with trim rings for a seamless finish. You can follow a similar removal process to extract damaged units before replacing them with new housings.
Proper drainage and a recess of 6 to 10 inches help prevent water buildup and protect the fixtures from damage. Installing a layer of pea gravel or a sump around the housing keeps it dry and stable over time. For a clean seal at ground level, you can adapt the same air-sealing techniques used for interior recessed lights to prevent moisture from creeping around the fixture edges. The resulting effect is dramatic uplighting that highlights textures of trunks or grazes stone walls while maintaining a clean, refined look during daylight hours. When your landscape deserves a polished appearance and the lighting source should stay hidden, well lights and in-ground fixtures are the best choice.
Match Landscape Lighting Roles to Your Yard’s Zones and Activities
Because your yard serves multiple functions after dark, each zone requires a specific lighting role to work effectively. For safety and circulation zones such as walkways and stairs, install even, downward-facing path or step lights. These fixtures help define edges clearly without glare, making sure movement is safe at night. Understanding the overall expense can help you budget; labor and materials often represent the largest portion of the final price. For safe installation, always follow a step-by-step wiring method to prevent electrical hazards. In task zones like your outdoor kitchen or patio, brighter, focused lighting is essential. Use downlights or area lights aimed at grills and counters to enhance functionality while avoiding excessive light spread. Choose warm-tone bulbs here to create a cozy atmosphere instead of harsh white light. For architectural and foundation zones, uplights or wall washes accentuate your home’s structure and add visual interest. Prioritize fixtures that resist weather damage, as these areas are exposed to the elements. Finally, to highlight focal points such as trees or statues, use accent lights to produce dramatic contrast against the ambient light, drawing attention to your yard’s key features. A recessed lighting system may use trim styles for directional control in outdoor covered zones.
Smart Landscape Lighting Placement Rules for Trees, Walkways, and Water Features
To effectively highlight trees, place one uplight 1 to 3 feet from the trunk. For large canopies, use two to three fixtures spread evenly to avoid flat, one-sided ornamentation. Cross-lighting from two sides adds depth and helps control harsh shadows, creating a more natural, three-dimensional appearance. Avoid placing lights directly under or too close to the canopy, which can cause glare or uneven lighting. Proper placement ensures your trees are illuminated beautifully while maintaining a balanced and inviting landscape. For large trees, using multiple lights prevents the common “UFO” effect of a single, overwhelming overhead glow, ensuring the illumination remains evenly distributed down the trunk and through the canopy. If your existing system lacks a remote or pull chain, you can still activate the lights by toggling a wall switch or installing a simple wireless retrofit kit. Before connecting any new fixtures, always ensure the power is off by switching off the circuit breaker to avoid electrical shock. For pathway illumination, position fixtures to cast soft pools of light rather than intense beams, which mirrors the diffused quality of recessed ceiling lights for a more refined ambiance.
Build Your Landscape Lighting Package: A Quick Selection Checklist
Start by clearly defining your primary lighting goal—whether it’s for aesthetics, safety, wayfinding, or security. This focus will guide your choices and prevent overbuying. Sketch your yard, marking features like trees, walkways, and patios; then divide large areas into zones to simplify planning. Select fixture types based on the effect you want, not just style, ensuring each fits its purpose. For a natural, inviting look, opt for warm color temperatures between 2700K and 3000K. Experiment with moonlighting techniques by positioning fixtures high in trees to cast soft, diffuse shadows, or choose historical lighting styles if you’re aiming for period-specific charm. Calculate the wattage of each fixture to determine your total system load—aim to keep this at or below 80 percent of your transformer’s capacity to ensure reliable operation. Measure the distances between fixtures and the transformer carefully, then pick cable gauges suitable for each run to prevent voltage drop, remembering that voltage drop can cause dimming. Decide on your control system—manual switches, automated timers, or sensor-based systems—based on the level of convenience you desire. For longer runs, consider that a 24V system reduces current and allows thinner cables while maintaining brightness. Finally, during daylight, test your fixture placements to adjust beam angles and optimize visibility, ensuring your lighting package is cohesive while preventing unnecessary expenses. For larger outdoor transformers, check that the fan housing on any nearby ceiling fixtures remains free of loose parts to avoid unwanted vibration noise.
Common Mistakes to Avoid When Choosing Landscape Lighting Fixtures
Choosing the wrong landscape lighting fixtures can ruin your entire design. To avoid this, select fixtures based on their intended purpose: path lights should illuminate walkways, uplights are best for highlighting trees and architectural features, and wall washers work well on textured surfaces. Proper placement is crucial; spacing lights too evenly can create an artificial, airport runway look, while placing them too close to lawns risks mower damage. Brightness and glare are often overlooked but are essential for creating mood and clarity—opt for layered beams to avoid washed-out details and neighbor annoyance. Pay attention to color temperature; mismatched Kelvin values can break the visual harmony of your yard. Lastly, prioritize weather-resistant materials like brass for durability, and choose energy-efficient LED systems to lower operating costs and reduce maintenance. Neglecting these details leads to dim, short-lived results that do not meet your landscape’s potential.