Thinking about upgrading your ceiling lighting but overwhelmed by options? Canless recessed lighting might be just what you need. It offers a sleek, easy-to-install look with energy savings, but it also has some caveats to consider.
In this guide, you’ll learn everything you need to know about these slim LED fixtures, including their pros, cons, and what to look for before making a purchase.
What Exactly Is Canless Recessed Lighting?
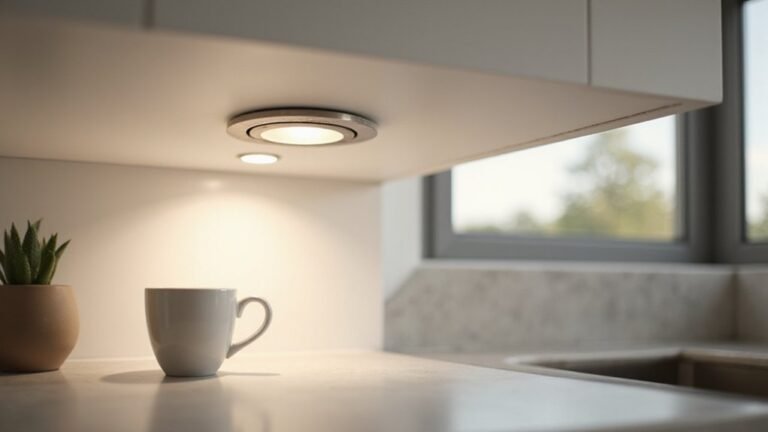
Canless recessed lighting is a type of lighting fixture that eliminates the traditional metal can housed inside the ceiling. Instead of a bulky can, these fixtures feature a thin, wafer-like LED disc with an integrated junction box, allowing them to sit nearly flush with the drywall. This streamlined design simplifies installation because you can mount the fixture directly into the ceiling opening without needing a deep housing. The low-profile form enhances the aesthetic of your space by providing a clean, recessed look with minimal visible hardware. Ideal for ceilings with limited space, canless lights deliver the same downward illumination as traditional can lights but with a much shallower, more modern assembly. This makes them a popular choice for achieving a sleek, unobtrusive ceiling design. For those seeking practical guidance and expert insight, these fixtures eliminate the bulky metal can that traditional recessed housings require. The integrated junction box typically uses push-in wire connectors for a secure and tool-free electrical connection. When selecting these fixtures, you will need to check the beam spread to ensure proper light distribution across the room.
5 Reasons to Choose Canless Lights
Canless lights are a popular choice because they offer several advantages for your home lighting needs. One of the biggest benefits is faster installation. Since these fixtures clip directly into the ceiling, you can save significant time and effort, especially during remodels or renovation projects. They also provide notable energy savings because integrated LEDs consume up to 80% less power compared to traditional incandescent bulbs. This reduction in energy use not only lowers your electricity bills but also decreases heat output, making your space more comfortable. Additionally, their slim, low-profile design allows them to fit into shallow ceilings and tight spaces where conventional recessed cans may not be practical. This design flexibility enables you to place lights precisely where they are needed, improving room brightness and coverage. Unlike traditional wall sconces that often project outward, canless lights achieve minimal ceiling intrusion to maintain a clean visual plane. For a safe installation, always use approved connectors to prevent loose connections and potential hazards. Finally, canless lights contribute a modern, clean look that enhances the aesthetic appeal of any space. Unlike traditional can lights that require significant headroom for installation, canless fixtures are ultra-thin and space-saving. For a safe and professional finish, always verify that your wiring connections are secure and follow proper wire gauge recommendations to avoid overheating.
5 Cons of Canless Recessed Lighting You Should Know
Canless recessed lighting has several drawbacks that you should consider before choosing it for your space. First, they have a higher replacement risk because the entire fixture must be replaced when the LED fails, unlike traditional fixtures where only a bulb is replaced. Matching discontinued models can be challenging, and variations in batch-to-batch production can lead to inconsistent color temperatures over time. This is a stark contrast to the simple seasonal adjustments you can make with a ceiling fan, where a quick switch in direction optimizes comfort and energy savings. Second, canless lights offer limited flexibility. Since most use fixed LED sources, you can’t adjust the brightness or tone once installed. Their fixed beam angle also reduces options for accent lighting, making them less versatile for decorative purposes. Despite their initial energy efficiency, this static nature can limit their long-term appeal. Third, the cost is higher upfront compared to traditional recessed cans, and installing multiple rooms can significantly increase your expenses. The specialized design requires precise ceiling cuts and access to joists, which complicates retrofit installations and may require professional help. Fortunately, troubleshooting these issues often involves a simple reset process that can restore functionality without needing a full replacement. Finally, the quality of canless fixtures varies across manufacturers. This inconsistency can lead to issues like poor dimming performance or startup delays, which might make future repairs or replacements more difficult. Despite these drawbacks, smart bulbs generally do not increase electricity usage significantly, as many models use low-wattage LEDs that consume minimal power.
When to Skip Canless Recessed Lights
Skip canless recessed lights when your ceiling renovation involves opening the ceiling itself. Since you’re already making structural modifications, their slim profile offers no benefit. Traditional housings typically provide better thermal management and are easier to replace in the future. If you are already opening the ceiling, consider wiring a ceiling fan instead, as the access makes installation safer and more straightforward.
You should also avoid canless lights if preserving the architectural integrity of your space matters. If your ceiling features original beams, ornate plasterwork, or historic details, cutting holes for recessed fixtures will damage those features. In such cases, opt for track lighting or surface-mounted fixtures that do not alter the ceiling’s character.
Refrain from installing canless lights where insulation is present unless you can verify compatibility. Non-IC-rated fixtures can pose overheating or fire risks if they do not have at least three inches of clearance around them. If you cannot confirm this clearance, skip canless recessed lights altogether.
Lastly, avoid canless lights if your goal is broad ambient lighting. These fixtures excel at spot lighting but create harsh shadows and a cave-like effect when used alone. To achieve a balanced illumination, supplement them with other fixtures designed for general ambient light.
Minimum Ceiling Clearance for Canless Fixtures
Canless fixtures require only 1 to 3 inches of ceiling cavity depth, making them suitable for shallow installations. Traditional can housings typically need 5 to 7 inches of clearance, so canless options are ideal for tight joist bays or ceilings with limited space. Ultra-thin wafer models often need just 1 to 2 inches of clearance above the drywall. When removing an old can housing, you will need to disconnect the wiring and unscrew the mounting bracket from the joist. Keep in mind that the actual required depth depends on the fixture’s specific design and manufacturer specifications. For those considering alternative lighting, choosing the right LED strip lights with a reliable power supply can also be a flexible solution for tight spaces. For rooms with ceiling fans, ensuring proper ceiling clearance prevents structural interference with the lighting fixture placement.
It’s important to check both the fixture’s installation instructions and labeling before purchasing. Some models are rated for direct contact with insulation (IC-rated), meaning they can be installed directly against insulation without risk. Non-IC-rated fixtures need about 3 inches of clearance from insulation and at least 1/2 inch from combustible materials such as wood framing to prevent fire hazards.
Always verify the fixture’s depth claims and compatibility with your ceiling structure. Remember that shallow ceiling clearance alone doesn’t ensure the fixture will fit perfectly; you must also consider wiring, joist space, and adherence to local building codes during installation.
Canless vs. Traditional: Cost, Space, and Longevity Compared
Canless fixtures are the better choice if space is limited. They require less than 2 inches of clearance, allowing you to install them around joists and pipes with greater flexibility. Traditional recessed cans need 5 to 7 inches of space, which can restrict your layout options. While traditional cans may seem more affordable initially, their higher installation costs—due to additional wiring and housings—can increase your total expenses. In contrast, canless units cost between $40 and $160 each upfront, and their simpler, quicker installation can lead to lower overall project costs.
In terms of longevity, canless fixtures often outperform traditional cans. They typically feature integrated LEDs that are more energy-efficient, saving you approximately $50 to $100 annually per room on electricity bills. They also require less maintenance since you won’t need to replace bulbs frequently. Though traditional cans might have a lower initial price, ongoing costs for bulb replacements and higher energy use can make canless options more cost-effective over their lifetime.
Are Canless Lights Dimmable and Switch-Compatible?
Canless lights can be dimmed and switch-compatible, but compatibility varies depending on the fixture and control system used. Some canless lights are designed to work with smart home systems via Bluetooth or wireless controls, allowing you to adjust brightness through an app or voice commands. Others require specific types of dimmers, such as triac, ELV, or 0-10V dimmers, to achieve smooth dimming without flickering. Always check the fixture’s listed control options before purchasing. Using an incompatible switch or dimmer can limit performance, cause flickering, or prevent proper dimming. Refer to the manufacturer’s compatibility guides or product specifications to ensure your chosen controls match the fixture. Improper wiring, such as loose connections, can also mimic common causes of malfunction found in solar landscape lighting systems. Proper pairing of the driver and control system is essential for a flicker-free, fully adjustable lighting experience. For those seeking a decorative alternative, wall sconce candle holders offer a classic ambient lighting option for various rooms. When installing, following a step-by-step method for connecting wire connectors ensures a safe and clean DIY finish.
What Happens When a Canless LED Dies?
When a canless LED fixture fails, it typically results in a complete loss of light. The first signs might be flickering or intermittent operation before the fixture stops working altogether. Heat buildup is the main reason for failure, as poor temperature regulation can damage the internal driver or LED module. Often, the failure stems from a faulty driver rather than the LED itself; since they are integrated into the fixture, you cannot simply replace a bulb. Instead, you need to replace the entire module or fixture, so confirming compatibility beforehand is essential. Sometimes, loose connections or a tripped thermal protector cause temporary issues—allowing the fixture to cool down may restore functionality. If you notice burn marks or detect a burning smell, address the overheating immediately to prevent further damage. Check for excess insulation packed around the housing, as this restricts airflow and triggers the thermal overload switch. The same principles of heat buildup and restricted airflow that can damage a ceiling fan also pose a risk to these fixtures.
Match Color Temp and Brightness to Your Room
Matching the color temperature and brightness of your recessed lighting to your room’s purpose ensures a cohesive and functional space. For bedrooms and living rooms, aim for a color temperature between 2700K and 3000K to create a warm, inviting atmosphere. In kitchens, switch to 3000K–3500K for a brighter, cleaner light that enhances visibility without feeling harsh. Never mix different color temperatures within the same room, as mismatched tones will stand out and disrupt the visual harmony. Similarly, just as you adjust ceiling fan direction for seasonal comfort, choosing the right light tone keeps your room balanced year-round. Understanding how wide beam angles work helps ensure you cover larger areas without dark spots. Always verify wire polarity before connecting any new fixture to prevent short circuits.
For brightness, choose fixtures with selectable lumen options. A 4-inch model typically provides around 600–650 lumens, suitable for lower ceilings, while 6-inch fixtures offering about 750 lumens work better in taller rooms. Always check for dimmer compatibility to allow precise control over light levels, enabling you to adjust from soft ambiance to full brightness. Keep all overhead lights and lamps within the same color temperature range to maintain a unified look throughout your space.
Wiring and Drywall Tips for a Flush Canless Finish
Turn off the breaker before starting any wiring or drywall cutting to ensure safety. Use a voltage tester on a known live circuit first, then check the circuit you plan to work on to confirm it’s de-energized. Run the cable in a daisy chain from the switch, leaving 12 to 16 inches of slack at each fixture location to make connections easier. Staple the cable every 4.5 feet, making sure to avoid joists and pipes that could damage or interfere with the wiring. Spacing lights evenly typically involves dividing the wall length by the number of lights in a row.
Use the included template to trace your hole on the drywall, then cut it cleanly with a drywall saw. Strip 6 inches of sheathing from the cable and 3/4 inch of insulation from each wire. Connect black to black, white to white, and green to ground. Tuck the wires into the junction box, close the cover tightly, and push the fixture straight into the drywall until the spring clips snap it flush against the surface. This process ensures a safe, neat, and professional-looking installation.