Thinking about trimming your LED light strips, but unsure where to cut without ruining the circuit? The key is to identify the marked cutting points, usually shown with a scissor icon, printed lines, or exposed copper pads.
Cutting at the wrong spot can break the circuit and leave sections dark. In this guide, you’ll learn exactly where and how to cut your LED strips safely and accurately.
What Happens If You Cut an LED Strip in the Wrong Spot
If you cut an LED strip in the wrong spot, you will break the circuit and make the segment beyond the cut permanently dark. Cutting mid-segment damages copper traces and internal components, which cannot be repaired. You’ll also lose color consistency across that section, as only part of the strip will light up while the rest remains unlit. Exposed copper pads create short-circuit risks, especially if you cut while the strip is still powered. This can lead to overheating or burned LEDs. Additionally, cutting incorrectly can compromise waterproof integrity, allowing moisture to seep into the damaged area. To safely handle any electrical project, you should always follow a step-by-step method that includes turning off the breaker to ensure no power is flowing. Remember, a ceiling fan’s direction depends on the seasonal rotation to optimize airflow throughout the year. Cutting outside designated code points causes section failure and prevents any LED operation beyond that point. The only viable option is to cut at a designated point on both sides of the damage and reconnect using a connector or solder, provided the copper pads remain intact.
How to Find Designated Cut Lines on Your LED Strip
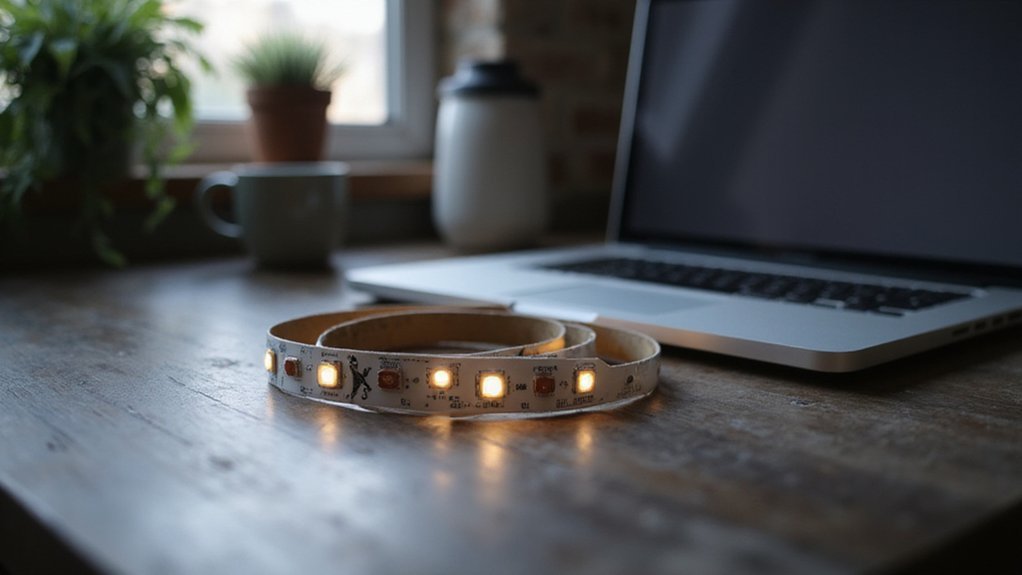
To find the designated cut lines on your LED strip, look for clear physical indicators printed directly on the strip. These cut marks typically appear as a scissor icon, dotted line, or a thin printed line that runs across the strip’s surface. They are usually positioned between two copper pads and are spaced at fixed intervals, often every 1 to 6 inches or 25 to 100 millimeters. The spacing varies depending on the LED density and voltage of the strip. If you see larger solder joints along the strip, these may also serve as alternative cut points, though copper joints are the primary guide for safe cutting. For a secure finish, always verify that your connections at the cut point are made using proper wiring techniques to prevent shorts. If connections fail after cutting, trying a reset using the power cycle method can restore functionality to unresponsive segments. Understanding how smart light bulbs communicate with controllers can help you troubleshoot similar connectivity issues in your lighting setup.
Before you can see these marks clearly, you might need to peel back the adhesive backing to remove any protective covering. The cut line is intentionally placed at these intervals so that each segment maintains a complete circuit, avoiding damage to the LEDs or resistors. Do not rely solely on color cues or the appearance of the strip—these physical marks are your safest guide for accurate cutting. Cutting anywhere else risks severing vital components and breaking the circuit. Remember, the mark indicates the circuit boundary, not an aesthetic or decorative alignment.
Three Signs You’re Cutting at the Right Spot
You’ll know you’re cutting at the right spot when you see three key visual indicators on your LED strip. First, a scissor icon is directly aligned with the cut zone, guiding you precisely where to cut. Following its line ensures a safe and clean cut without damaging the circuitry. Second, look for exposed copper pads on the strip. Make your cut between or through the center of these pads to maintain the circuit’s integrity. Cutting through or missing them can break the connection and render the section unusable. Third, a printed straight line runs across the strip indicating the optimal cut position. Center your blade on this line to achieve a clean, straight trim. An offset or jagged cut risks damaging the trace pathways, which compromises the strip’s safety and functionality. After cutting, plug in the remaining section. If it lights up normally, you’ve cut precisely at the right spot. These three markers—the icon, copper pads, and printed line—serve as reliable signals that your cut is correct and your LED strip remains safe to use. Cutting off-center leaves larger pad areas, which eases soldering and maintains LED integrity. For a cleaner finish, you can pair this strip with a Kasa Smart Plug to control it through Alexa without any complex rewiring. Using a wire stripper on the exposed copper pads helps prepare clean connection points for soldering or connectors. This cutting method avoids needing to pull a chain or use a remote, as a properly connected strip will respond directly to its power source.
Standard Cut Intervals for LED Strips: 3 LEDS, 15 Mm, 50 Mm
The standard cut intervals for LED strips are 3 LEDs, 15 mm, or 50 mm, depending on the strip’s design. On a 12V LED strip, a cut point appears every 3 LEDs, which translates to roughly every 5 centimeters (2 inches). This spacing occurs because those LEDs share a single electrical segment. For 24V strips, the interval doubles to 6 LEDs, roughly every 10 centimeters (4 inches). These intervals are marked by a scissor icon and copper pads, indicating safe cutting points. Cutting anywhere else risks breaking the circuit and damaging the strip. The color temperature of the LED strip doesn’t influence these intervals, but waterproof ratings do. For waterproof strips coated in silicone, the same cut intervals apply, though you’ll need to reseal the strip afterward. Shorter intervals on 12V strips allow for more precise customization, ideal for projects with tight space constraints. Always verify the safety limits before cutting, as exceeding them can damage the strip or create a fire hazard.
How to Measure and Mark Your Strip Before Cutting
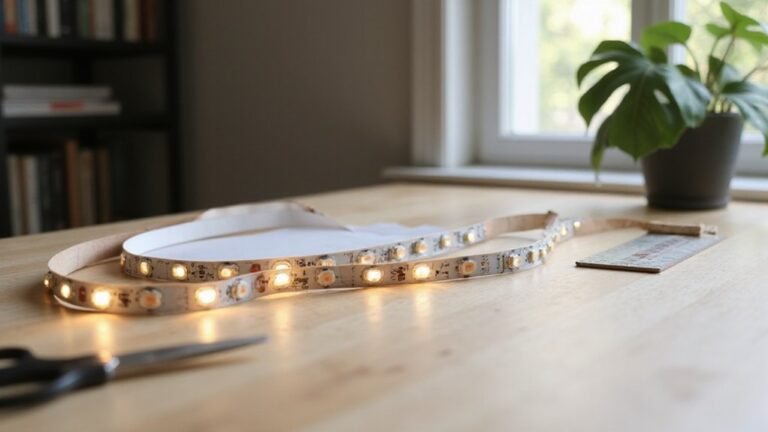
To measure and mark your strip before cutting, start by accurately measuring the length needed using a ruler or tape measure. Record the exact measurement rather than estimating to ensure a precise fit. Lay the strip flat on a surface and identify the nearest designated cut line, often marked by a scissor icon or copper pads. If your measurement falls between segments, choose the closest valid cut point to maintain proper color consistency throughout the run. Avoid marking directly on LEDs or circuitry; instead, use a pencil to mark the cut line on the backing material. Be mindful that waterproof coatings can interfere with the visibility of cut lines, so inspect the area under good lighting. Always turn off the power before marking or cutting to protect the circuitry using the same safety principles as wiring landscape lighting.
Double-check that your mark aligns with the measured length and sits between LED groups. Confirm that the backing’s adhesive remains intact and compatible near the cut zone, to prevent detachment or damage. If you plan to reconnect the strip later, verify the polarity at the marked point. Also inspect waterproof coatings for integrity before marking. Ensure you are cutting only where designated cut lines are visible, as battery-operated string lights may require checking the spacing between segments for consistent illumination. Accurate marking ensures a clean cut, minimizes waste, and guarantees proper functionality afterward.
The Right Tools for Cutting an LED Strip Cleanly
Using the right tools makes cutting an LED strip clean and precise. Start with a ruler to mark the exact points where you plan to cut; this ensures your cuts are straight and at the designated break points. Use a fine-tipped marker or a dedicated soldering iron tip to transfer your cut marks clearly onto the strip, preventing mistakes during cutting. Always disconnect the power supply before making any cuts to avoid shorts and electrical hazards. After cutting, inspect the strip for any damage—check that no LEDs or copper traces are nicked or broken, as this can affect the strip’s function. Test continuity with a multimeter to confirm that the electrical path remains intact. To insulate the exposed copper pads, slip on heat shrink tubing and use a heat gun to shrink it snugly around the connection. Consider whether professional labour costs are justified for wiring work, as mistakes can be expensive. Using wire connectors instead of soldering can simplify reconnections and reduce the risk of damaging the strip. For secure wire joining after cutting, adopt safe twisting techniques to ensure a stable and clean connection. With these tools and steps, you’ll achieve a neat, professional-looking cut every time.
Can You Reconnect an LED Strip After Cutting?
Yes, you can reconnect an LED strip after cutting, as long as the cut was made along a proper designated line. To do this, you’ll need a new connection method such as a clip-on connector or soldering. Clip connectors are quick and easy but must match the strip’s width and pad layout exactly. Soldering provides a stronger, lower-profile connection but requires more skill and tools. Before reconnecting, always turn off the power supply to prevent damage or shorts. Maintain your strip’s color customization by aligning channels correctly, connecting positive to positive and matching each color channel properly. Incorrect alignment or reversing polarity can prevent the strip from lighting and may cause damage. If you encounter connection failures, troubleshooting the setup with a Wemo smart plug reset can help isolate power issues. For safe wiring, it is also important to use a wire stripper to remove insulation cleanly without nicking the copper. Test your connection before mounting and cover any exposed conductors with electrical tape or heat shrink tubing to prevent shorts. A clean, straight cut at the designated line ensures your strip can be safely reused. Always cut only on copper connection points to ensure the strip remains functional for reconnection. Additionally, check the manufacturer’s maximum recommended run length before extending multiple strips to avoid voltage drop.
Four Cutting Mistakes That Ruin Your LED Strip
Cutting your LED strip at the wrong spot can ruin it. Always cut exactly at the marked copper pads, which are designed to maintain the circuit. Cutting elsewhere breaks the connection, leaving part of the strip dead and unusable. Use sharp scissors for clean cuts; dull tools crush the copper traces and can cause immediate failure or intermittent issues later. Not all strips are meant to be cut; check the manufacturer’s markings before proceeding. For under cabinet installations, you must plan the cut length to match the desired cabinet layout and avoid leftover unused segments. Waterproof strips need to be resealed after cutting to prevent moisture from degrading the LEDs and reducing their lifespan. Also, inspect the cut end carefully; a tiny nick can interrupt power flow. Test each segment after cutting before mounting it to ensure proper functionality. Following these steps helps keep your LED strip functional and reliable. When cutting, also consider that higher waterproofing levels decrease heat dissipation capacity, which can affect performance if the strip is enclosed.
Why You Should Never Cut an LED Strip While Powered
Never cut a powered LED strip—doing so creates an immediate risk of an electrical short. When the strip is energized, metal tools like scissors or blades can bridge the positive and negative copper pads, causing a short circuit. This can damage the LED segments, the power supply, or both components. Even low-voltage strips carry enough current to cause sparks or overheating if shorted while powered. Leaving it uncut or doing so improperly can burn out LEDs or leave sections nonfunctional. Always disconnect the power supply fully before cutting to ensure safety.
Following proper cutting procedures is essential to avoid irreversible damage. Cutting while the strip is live can lead to overheating or sparks, which pose fire and shock hazards. Exposed copper pads at the cut point can be dangerous if not insulated. Power supplies may shut down or become damaged from excessive current draw caused by improper cuts. Many manufacturers void warranties if the strip is cut while connected to power. Always turn off and unplug the LED strip, cut only at designated marked lines, and cover exposed ends with insulation before reconnecting power.