Struggling to evenly light your Christmas tree? Getting the right number of lights and placing them just right can make all the difference in creating that warm, festive glow.
With a few simple tips, you’ll be able to beautifully illuminate your tree and easily spot any dark spots. Keep reading to learn the easiest way to string lights like a pro.
How Many Lights Do You Need? (100 Per Foot Rule)
The rule of thumb is 100 lights per foot of the tree height. For a 6-foot-tall tree, that’s about 600 lights to achieve a balanced and evenly lit appearance. A 7-foot tree would need roughly 700 lights. This guideline serves as a starting point, but your actual lighting needs can vary based on your desired brightness and display style. For a subtler, lighter look, aim for 50 to 100 lights per foot. If you want a more dramatic, densely lit effect, doubling that amount to around 150 lights per foot makes the display stand out more. Always be mindful of safety by not exceeding the manufacturer’s recommended connection limit to prevent overheating. Remember, denser or larger trees require more lights to ensure even coverage and a festive glow. For safe installation, ensure the wiring connection is secure to prevent electrical hazards. Similarly, you might adjust the fan direction seasonally to optimize airflow and energy efficiency. To further reduce risk, always turn off the circuit breaker before handling any electrical wiring.
Test Every Strand and Inspect for Damage First
Start by testing every strand of holiday lights before you decorate. Plug each strand into a known working wall outlet—avoid using a timer, dimmer, or extension cord—to verify that the entire run lights from end to end. This step helps you identify dead or malfunctioning strands early, so you won’t have to remove and reconnect lights later.
Inspect the full length of each strand for damage. Look closely for frayed wires, cuts, cracked sockets, or melted spots, and discard any strand with compromised wiring or damaged plugs. Check the bulbs for compatibility by ensuring none are broken or missing. If a strand does not light, check the plug fuse with a multimeter to confirm it’s functioning. Keep a tested, working bulb nearby to help troubleshoot failures by socket using the Leapfrog method. Move this bulb socket by socket through the entire strand; a discolored bulb indicates a broken filament. Diagnose sections systematically until you isolate the faulty bulb or section, reducing guesswork and ensuring your lights work reliably and safely. Using a non-contact AC voltage tester near each socket helps quickly trace where voltage stops along the series circuit to locate the break. If the strand still fails after checking all bulbs, try a hard reset by unplugging it for at least ten seconds before plugging it back in to clear any internal short. For a professional-looking setup, consider using a guide wire to support the light strands and keep them evenly spaced along the tree. Remember that similar electrical troubleshooting principles apply to other household devices, where verifying power at the source is the first step.
Spiral Method: Wrap Lights From Top to Bottom
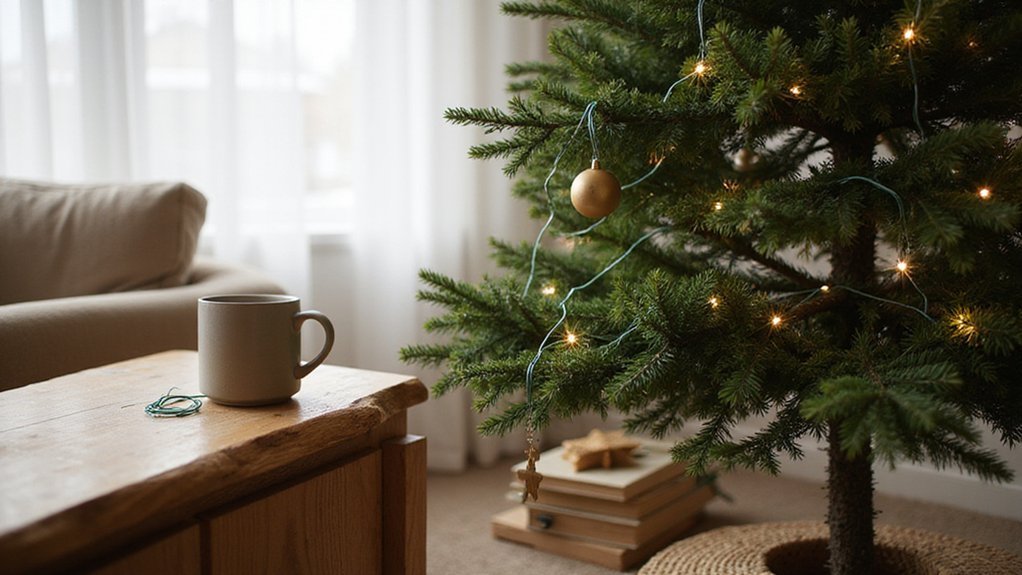
Start your spiral method at the top of the tree, securing the plug end near the center peak. Wrap the strand around the tree in a continuous spiral, working your way down. To achieve ideal lighting density, tuck bulbs deep into the branches and pull some outward. This creates depth variation, preventing a flat, two-dimensional look. Keep the rows evenly spaced to maintain spiral control; consistent gaps produce a uniform visual rhythm. For maximum drama, use up to five strands per foot of tree height to cover the entire tree in a uniform glow. When selecting a fan for summer, consider energy-efficient models to lower your electricity bills.
Don’t just wrap the outer edge—push lights closer to the trunk as well, filling in interior shadows. As you descend, slightly stagger each revolution to create a fuller, more natural appearance. Leave enough slack at the base for easy plugging, and step back periodically to spot any dark areas. Adjust coverage as needed before finishing, ensuring an even and professional look throughout. Ensure all connections between strands are secure twist-on connectors to prevent power loss and avoid dangerous short circuits as you move down the tree. For a softer ambiance, consider using low-voltage systems to reduce glare and energy consumption while still maintaining bright, consistent coverage.
Zigzag: The Fastest Way to Cover a Big Tree
The zigzag method is your quickest way to decorate a large tree with full, bright lights. Instead of circling the tree, you weave the strand back and forth in rows or columns, avoiding full-circle wraps. Start at the top or bottom and run the lights in a U-shape, reversing direction without looping around the trunk. Keep each pass about three inches apart for even coverage. This way, you avoid wasting lights on the hidden back, conserving strands for the visible front. Vary the depth of the strand by tucking some lights near the trunk, creating an inside-out glow and adding dimension. Using approximately 100 to 150 lights per foot of tree height ensures a bright, balanced look. This approach speeds up your decorating and results in a vibrant, evenly lit tree with less effort. For a similar dimensional effect indoors, wall sconce candle holders can provide a warm, layered glow in any room. For a touch of practicality in other spaces, small ceiling fans with light offer a similar blend of brightness and efficiency. To keep your outdoor lights shining brightly, you can also apply gentle cleaning methods to remove dirt and grime from solar panels.
Branch-by-Branch: For the Densest, Most Complete Look
For the densest, most complete look, wrap each branch individually rather than simply circling the tree. Start near the trunk, then work your way toward the tip of the branch. Once you reach the end, coil back inward toward the trunk before moving on to the next branch. This technique significantly enhances both branch density and tree symmetry, resulting in a uniform, heavily-lit appearance. For a similar effect in home lighting, apply recessed can lighting layout principles by spacing the lights evenly to ensure full coverage and avoid dark spots.
Wrap each branch in a tight circular or back-and-forth motion, covering gaps and adding dimension. Working from the bottom upward ensures that larger branches are handled first, providing a solid foundation for the rest of the lights. Vary the placement of bulbs—some deeper, some closer to the surface—to avoid a flat, one-dimensional look. Repeat this pattern on every branch until the strand runs out. The goal is to make the tree look loaded with lights rather than just outlined, creating a rich, full glow. For a seamless finish, secure the wiring along the trunk using small clips or ties to prevent sagging and maintain a clean layout. Using multiple strands (10-12) ensures thorough coverage, providing consistent brightness from all angles. When connecting multiple strands, using Wago connectors provides a reliable and reusable alternative to traditional wire nuts.
Push Lights Deeper to Add Depth and Hide Cords
Pushing some bulbs deeper into the tree—about 3 to 4 inches toward the trunk—helps create a layered, three-dimensional look. Leave other bulbs near the branch tips to enhance contrast and avoid a flat, surface-only appearance. This mixed placement produces an “inside-out” glow that highlights both the tree’s inner structure and outer silhouette. Work in vertical columns or a zigzag pattern, steering clear of tight spirals, so you can easily move strands in and out of branches. For cutting LED strip lights, you must only cut at designated cut points to avoid damaging the circuit and creating a fire hazard. For a similar effect in home lighting, 4 inch recessed lighting can provide more focused depth compared to larger options. Similarly, adjusting the ceiling fan direction for each season can help improve airflow and energy efficiency in your home.
For hiding cords, push connector points and extra wire deep into the branches close to the trunk. Tuck slack toward the back of the tree to keep the front uncluttered. Let the lights rest naturally on branches without wrapping them too tightly. Slightly bending a branch can help secure the strand in place. Step back regularly to check the overall effect, ensuring you build depth rather than a flat surface.
Fix Dark Spots With a Second Pass of Lights
A second pass of lights is the most effective way to fix dark spots without redoing the entire layout. Start by turning off the room lights to clearly see shadows. Focus only on flat or sparse sections where the branches block the first layer of lights. Your goal is to fill in these areas with additional illumination, not to achieve perfect symmetry.
Match the second strand to the first in bulb style, color temperature, and density. Consistency ensures your fixes blend naturally and don’t stand out as patchwork. Aim the additional lights into interior pockets or dense branch areas, especially in the lower middle or rear zones. A short run of extra lights often provides enough brightness to eliminate dark spots.
Finally, turn the lights back on and evaluate the overall effect. Move a few bulbs if any area still appears too dark. Stop adjusting once the brightness is even across the display. Overlighting can create glare or a washed-out look. Spot-filling is a quick, effective way to improve your display without the hassle of starting from scratch.