If you’re trying to figure out whether to choose can lights or other recessed options for your ceiling, you’re not alone.
The difference between them is simple but important to understand. Essentially, all can lights are a type of recessed lighting, but not all recessed lights are can lights.
Keep reading to see how they compare and which might work best for you.
Can Lights vs. Recessed Lights: What’s Actually Different?
Recessed lighting is the broad category that includes any fixture installed into the ceiling. Can lights are a specific type within this category, recognizable by their cylindrical metal housing. Can lights are versatile because you can swap out the bulbs for different Kelvin temperatures, giving you more control over light color options. However, not all bulbs work with every dimmer switch, so mismatched combinations can cause flickering. While can lights allow you to upgrade bulbs individually, the fixture’s housing remains fixed in design. Think of recessed lighting as the umbrella term, and can lights as a traditional, modular subset that uses cylindrical housings. For ambient accent lighting, homeowners might also consider wall sconce candle holders as an alternative fixture style. Additionally, adjusting the fan direction seasonally can improve energy efficiency and comfort.
The One Part That Changes Everything (Housing vs. No Housing)
The key difference between can lights with a housing and canless fixtures is the presence of a housing. Housing is a metal can that fits into your ceiling and supports the entire fixture. It holds the socket, bulb, and wiring, and adds depth and structural support. This traditional approach is favored if you want a recessed lighting that blends seamlessly into the ceiling, maintaining a clean, finished look.
In contrast, canless fixtures integrate everything—LED driver, trim, and housing—into a single, slim unit. They do not require a separate housing, making installation simpler and faster. These fixtures are ideal if you prefer a sleek, low-profile design and want a minimalist appeal. The choice boils down to whether you prioritize the robustness and support of a housing or the streamlined look of a canless system. Your decision will also depend on electrical compatibility, as some systems require specific types of housings. Neither option is inherently better; it comes down to your aesthetic preference and installation needs.
3 Scenarios Where a Can Housing Is Required (and 3 Where Canless Works Better)
A can housing is necessary when your ceiling is deep enough and you want a traditional fixture that meets insulation-contact codes. It’s required for bulb-serviceability and future beam-angle adjustments, offering aesthetic versatility with different trims. Additionally, if the installation demands a separate junction box, a can housing ensures proper wiring safety and compliance. If you need access for maintenance or plan to replace bulbs periodically, a can provides the needed space and support.
On the other hand, canless fixtures work better in shallow ceilings with limited attic space. They eliminate the bulky housing, reducing ceiling penetrations and potential air leakage. Canless designs are ideal for energy-efficient retrofits, as their slim, self-contained units simplify sealing and help minimize energy loss. Maintenance-wise, canless fixtures are advantageous when you accept a sealed LED with a long, integrated lifespan since bulb replacements or repairs aren’t typically required. The trade-off is losing modular flexibility; however, installation is faster, with fewer parts, making them suitable for quick, low-profile setups. For those prioritizing energy savings, consider how minimizing energy loss can lower utility bills over time.
Can Lights: Why Replaceable Bulbs and Custom Trims Still Matter
Replaceable bulbs and custom trims still matter because they give you control over serviceability, cost, and design. When a bulb fails, you can swap it out in minutes without needing to dismantle the entire fixture. This means no specialized labor or full fixture replacement, making maintenance quicker and more affordable—especially when managing multiple units. You also gain flexibility in light quality and aesthetics: you can change the color temperature, adjust brightness, or add dimmability to match different tasks or mood settings. Custom trims enhance the fixture’s look by helping it blend seamlessly into your ceiling or by directing light toward artwork or specific areas. Additionally, modern LED bulbs are energy-efficient, significantly reducing power consumption while lasting for years. Upgrading bulbs without replacing the housing keeps your lighting layout adaptable, minimizes waste, and maintains the relevance of your can lights over time. For installations involving multiple fixtures, understanding how to wire them correctly ensures consistent performance and safety, so consider following a safe wiring guide for a clean DIY finish. Traditional can lights, however, often require significant headroom for installation, unlike modern canless fixtures that fit in tight spaces. In contrast, uplights work by directing illumination upward to wash walls or ceilings, creating an entirely different ambient lighting effect that changes how a room feels. As noted in reviews of the best lamp for floor, prioritizing fixtures with interchangeable parts can also simplify long-term upkeep and style updates.
Canless Recessed Lights: Where the Slim Profile Wins
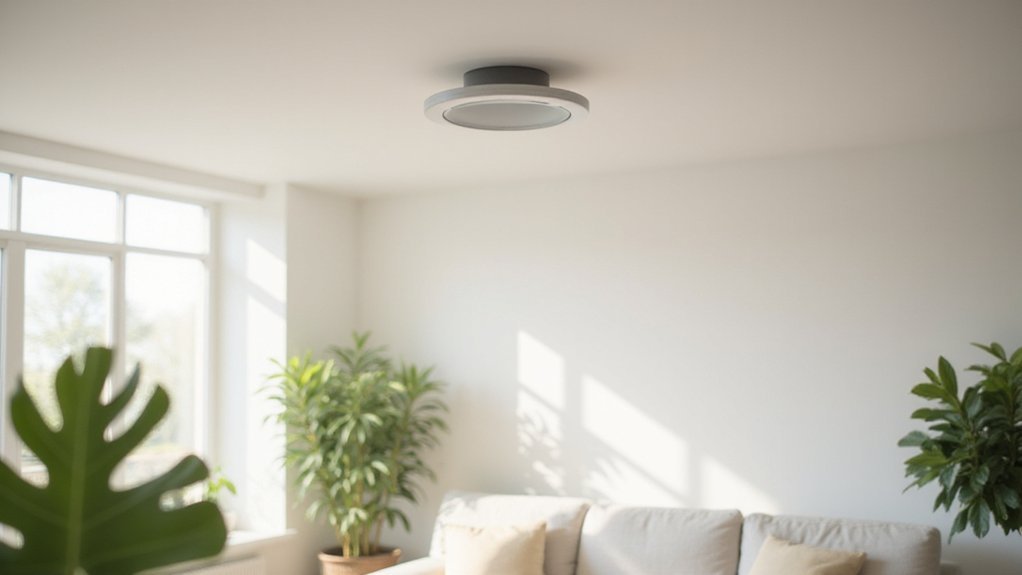
Canless recessed lights feature a slim, integrated LED fixture that offers a sleek profile suitable for tight spaces. These wafer-thin models can be installed in ceilings with as little as 2 inches of clearance, making them ideal for shallow cavities or attic spaces with limited room. Their low profile creates a flush, minimalist ceiling that seamlessly blends into modern interior designs, enhancing aesthetic appeal.
In addition to their compact size, these fixtures are highly energy-efficient, consuming up to 80% less power than traditional halogen cans. The integrated LEDs are rated for 30,000 to 50,000 hours, providing long-lasting performance and significantly reducing the need for replacements. The all-in-one design simplifies remodels by reducing structural modifications above the ceiling, resulting in a cleaner, less cluttered look without sacrificing lighting quality. For safe installation, always follow safe wiring tips to ensure a clean and professional DIY finish.
Installation Gotchas: Depth, Drafts, and Drywall
Measuring your ceiling cavity depth, sealing drafts, and checking insulation compatibility are critical steps to avoid installation issues. First, measure the actual depth of your ceiling cavity. Standard recessed cans require 5 to 8 inches of space, while ultra-thin fixtures need only 1 to 2 inches. Oversized fixtures can create a drywall fit nightmare, causing warping and disrupting ceiling aesthetics. Ensure you follow safe wiring tips to avoid electrical hazards when connecting the fixture. When running the wiring, always use a wire stripper to remove insulation without nicking the conductor.
Next, address drafts by sealing the fixture to the drywall cutout. Poorly sealed housings allow conditioned air to escape, increasing energy waste. Ensuring a tight seal prevents leaks and helps maintain climate control. As with battery-powered options, selecting the right power source ensures your setup meets both safety and performance needs.
Finally, verify insulation compatibility. Non-IC rated housings need a clearance from attic insulation to prevent fire hazards. IC-rated housings can be packed tightly with insulation but only if you confirm the rating beforehand. Measure the depth accurately, seal drafts properly, and double-check the insulation rating to avoid costly rework.
Upfront Cost vs. Long-Term Savings: Which Wins?
The decision between upfront cost and long-term savings depends on how long you plan to stay in your space. Recessed fixtures installed in existing ceilings typically cost between $200 and $400 per unit, making them a significant initial expense. In contrast, canless LED fixtures are much more affordable upfront, generally priced from $15 to $50 each before labor. Proper blade balancing can prevent wobbling that wastes energy and creates noise in ceiling fans, a related consideration for safe operation. For a clearer financial picture, it helps to weigh the total cost of ownership covering installation, energy, and maintenance over several years.
Although canless LEDs have a lower initial price, they can save you hundreds of dollars over time through reduced energy bills. A canless LED can save up to $50 annually in energy costs, often offsetting the higher upfront investment in traditional fixtures within a few years. Additionally, LEDs offer a sleeker, low-profile look that enhances aesthetic appeal. Long-term operational savings from LED technology also stem from their extended lifespan, which drastically reduces replacement costs compared to traditional bulbs. If your plan is short-term, cheaper fixtures may seem more attractive. However, for high-traffic or long-term spaces, investing more now in LED recessed lighting delivers savings through lower utility bills and fewer replacements over its lifespan.
How to Pick the Right Recessed Light for Your Ceiling
Choosing between a can light and a canless fixture depends on your ceiling’s space and your lighting needs. Start by measuring your ceiling depth. If you have shallow plenums or limited attic clearance, a canless fixture is the better choice because it mounts as a low-profile unit without bulky housing. However, if you have deep joist cavities and plan to install a fan, you must follow proper wiring safety steps to avoid fire hazards. You should also verify the fixture’s IC rating to ensure safe contact with insulation.
Next, consider your trim options. The trim impacts glare and how visible the fixture is in your space. Select a trim that complements your decorative accents and matches the ceiling paint for a seamless look. A 4-inch aperture is ideal for tight or focused lighting tasks, while 6-inch fixtures provide broader general illumination.
Finally, evaluate the light source. Traditional can lights use replaceable bulbs, giving you flexibility to adjust color temperature or brightness over time. In contrast, integrated canless fixtures have built-in LEDs, which means you’re committed to their performance and color. Choose based on whether you prefer easy bulb swapping or a sleek, flush ceiling appearance.
Your Decision Framework: 5 Questions to Choose
To choose between canned and canless lighting, start by assessing your ceiling space. If your ceiling cavity is less than 5 inches deep, canless fixtures are often the better choice because they require minimal clearance. Traditional can lights usually need at least 6 to 8 inches of clearance to accommodate the housing and insulation.
Next, consider your priorities for energy efficiency and air sealing. Canless fixtures typically integrate into the ceiling and offer tighter thermal envelopes, reducing heat loss and improving energy savings. If you’re aiming to enhance air sealing, canless designs are generally more seamless and less prone to gaps.
Ease of bulb replacement is another factor. Can lights allow straightforward bulb swaps, which can be important if you’re using a specific type of bulb for security or task lighting. Canless units often have built-in LEDs that last longer but might not be replaceable, so think about maintenance preferences.
Budget is essential. Can lights tend to have lower initial costs, especially for standard models, but canless fixtures may offer energy savings over time that offset higher upfront expenses. If you’re prioritizing an investment that pays off in reduced energy use, canless might be more economical long-term.
Finally, if your design includes decorative accents or trim styles, canless fixtures usually provide a sleek, seamless look, ideal for modern aesthetics. In contrast, cans give you more options for decorative trims and accent lighting styles. Your choice should match your ceiling constraints, maintenance ease, and visual goals.