Ever wonder how close recessed lights should be to your walls? Getting this distance right is key to achieving the perfect glow without shadows or overly bright spots.
Typically, placing the first row about half the ceiling height from the wall works well for general lighting. But for wall washes or accent lighting, you’ll need to bring fixtures closer—beam angle and your spacing grid also influence the placement.
Keep reading to learn the details behind ideal recessed light positioning.
The Rule: Half Your Ceiling Height From the Wall
Position your first row of recessed lights about half your ceiling height away from the wall. For an 8-foot ceiling, that means placing the lights roughly 4 feet from the wall. For a 10-foot ceiling, push that distance to about 5 feet. This rule isn’t a strict code, but it’s a reliable starting point for achieving even illumination. Using this baseline, you control how light spreads across the room, reducing dark spots near the edges and creating a balanced overall glow. To ensure precise spacing, you should divide the wall length by double the number of lights in a row to calculate exact distances from the wall. For safe installation, always turn off the power at the circuit breaker before running any wiring. A wobbling fan blade can often be corrected by measuring the distance from the blade tips to the ceiling to find the source of imbalance. To further refine the beam spread and brightness, consider choosing between BR30 vs BR40 bulbs based on your ceiling height and desired coverage.
Keep in mind that room shape and the number of fixtures will influence the exact placement. The half-ceiling rule is flexible enough to adapt to different spaces but simple enough to guide your initial layout. Starting here gives you control over the lighting design without overcomplicating the process, allowing for adjustments as needed.
When the Rule Fails: Wall-Wash and Accent Lighting
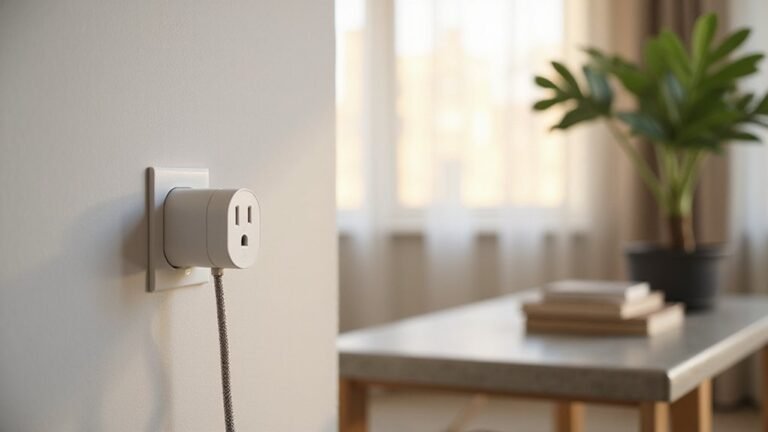
When switching from general ambient lighting to wall-wash or accent lighting, the half-ceiling rule often no longer applies. Instead, you’ll need to intentionally break this rule to avoid creating harsh scalloped shadows or uneven light distribution. For art placement, place accent fixtures roughly 30 to 36 inches from the wall and aim the beam at a 30-degree angle to focus directly on the artwork. For shadow elimination, fixtures should be positioned closer—about 1.5 to 2 feet from the wall—which allows the light to spread softly and evenly across the vertical surface. If you position the fixtures too close, you risk creating overly concentrated brightness that can cause glare. Conversely, if you place them too far away, the light will lose intensity and fail to highlight your wall effectively. When working with textured walls, keep the fixtures at 1.5 to 3 feet from the surface. This distance maintains the wall’s depth and character without flattening or washing out the texture. Remember that wall-wash and accent lighting often require different trims or beam distributions—focusing on tailored beam spreads** or beam shaping accessories—rather than just adjusting the distance. For those interested in automating the control of these accent lights, a Kasa smart plug offers a convenient way to manage power and scheduling without complex wiring. Proper fixture selection and placement are key to achieving the desired visual effect without emphasizing flaws or creating unintended shadows. For those seeking similar precision in other decorative settings, consulting a buyer’s guide on top light bulb picks** for chandeliers can help ensure the correct beam spread and ambiance for hanging fixtures.
Let Beam Angle Decide Your Distance
If your fixtures have a narrow beam angle between 25° and 40°, you should position them 18 to 30 inches away from the wall. This range ensures the spotlight properly covers the vertical surface without creating a dark border around the lighted area. The beam spread directly influences this distance—narrower beams need to be closer, while wider beams can be placed farther back. For medium beams measuring 40° to 60°, a distance of 24 to 42 inches works well for most standard layouts. Wide beams, spanning 60° to 120°, allow for even greater setbacks as they distribute light more broadly across the wall. When considering long-term performance, remember that smart switches typically outlast smart bulbs and offer a lower running cost over time. Before fitting the new unit, be sure to check the connector type and follow proper removal steps to avoid damaging the wiring. Remember to consider the fixture height when determining placement. For example, with an 8-foot ceiling and a 60° beam, the light circle on the floor will be approximately 11 feet in diameter. In general, matching your fixture’s placement to its cone width ensures optimal coverage and avoids light spill or dark spots. For homeowners seeking a decorative accent, the wall sconce candle holder style can influence how far the light source sits from the wall, altering the effective beam throw.
Why Spacing Dictates Your Wall Distance
Your recessed light placement is dictated primarily by fixture spacing, not wall distance. For an 8-foot ceiling, fixtures are typically spaced about 4 feet apart. The first row then sits approximately 2 feet from the wall, which is half the spacing measurement. If you increase the spacing to cover a larger room, the wall distance naturally widens as well, maintaining even light overlap. This means that trying to fix the wall distance independently will result in uneven lighting, like bright spots between fixtures or darker edges near the perimeter. Essentially, the spacing grid is the rule-maker; your wall placement follows its rhythm. Remember, while fixture color and temperature influence ambiance, the spacing determines the actual layout and distribution of light. Just as you adjust the ceiling fan direction seasonally to optimize airflow, you must adjust your spacing grid to match room dimensions for consistent illumination.
The 24-Inch Minimum Is Just a Floor
The 24-inch minimum is just a floor, not a hard rule. While many people think that 24 inches from the wall is ideal for recessed lighting, it’s actually the starting point. You should not lock yourself into this one measurement. Larger offsets are increasingly popular, especially in rooms with higher ceilings. For a 9-foot ceiling, the recommended distance often ranges from 30 to 42 inches. Standard guides suggest a practical range of 24 to 36 inches or even wider, depending on your space and design goals. A similar principle applies to battery-operated string lights, where adjustable fixture spacing helps achieve even illumination across different layouts. Color schemes also influence placement. Darker rooms absorb more light, so fixtures may need to be positioned closer to the wall to prevent shadowed edges. The initial 24-inch rule exists because your first row must at least reach the wall to avoid creating a cave-like effect. But don’t settle for that alone. Adjust the distance upward based on ceiling height and fixture spacing. Use the half-spacing rule as your guide—spacing fixtures evenly and considering room-specific factors—rather than adhering strictly to a fixed number. When comparing options, canned lighting performance often mirrors recessed fixtures in brightness, but the trim and housing choices can alter beam spread and wall wash effectiveness. Additionally, if a fixture fails to illuminate properly, checking the wiring connections can resolve similar issues found in LED strip lights.
Adjusting Wall Distance for Furniture and Odd Rooms
Adjust the wall distance based on furniture and room shape. The standard 24-inch rule provides a good starting point, but large furniture like sofas, beds, or storage units will block the light if placed too close. For these pieces, shift the fixture farther from the wall—around 36 inches or more—to ensure the light remains effective and doesn’t get swallowed up.
For cabinets or tall furniture, aim to place the fixture about 12 to 18 inches from the face of the unit. This distance helps minimize shadows and distributes light evenly across the space. Using smart plugs can further reduce energy waste by automatically turning off lights when furniture blocks them or when the room is unoccupied. Similarly, adjusting the ceiling fan to spin in reverse during winter can help circulate warm air and improve overall room comfort.
Irregular room shapes, such as alcoves or angled walls, also require flexibility. Instead of relying solely on geometric midpoints, position your lights based on the room’s primary focal points—areas where you spend the most time. Avoid letting narrow wall sections dictate your layout; instead, aim the light beam where it will be most functional. When dealing with uneven dimensions, consider a proportional grid: place lights closer to one wall and farther from another to achieve consistent coverage across the entire floor plan. To maintain control over these adjustments, ensure your bulbs are compatible with smart systems that allow for voice-activated dimming.
A Step-by-Step Method to Find Your Perfect Distance
To find the optimal recessed light distance from the wall, follow this five-step method. First, measure from the finished wall line, not the framing, since this gives the actual position for your fixture placement. Second, determine your lighting goal—whether you want general, accent, or wall-wash lighting—as this influences the spacing and placement. Third, use the starting formula: for general lighting, position the fixture at half the ceiling height, while wall-wash lighting needs about 1.5 to 2 feet from the surface.
Fourth, check the beam angle of your recessed lights. Wider beam angles—above 60 degrees—offer more flexibility, but a 30 to 45-degree angle ensures even coverage without spillover. Narrower angles provide more focused illumination, suitable for accent lighting, but require precise placement. Fifth, verify the spacing between fixtures. Typically, the wall-mounted light should be about half the distance between fixtures to avoid uneven light zones. For tighter layouts, consider that twist-on connectors offer a quick and secure way to join fixture wires without soldering.
Before finalizing your placement, test the color temperature of your lights. Cooler tones (around 5000K) can feel harsher when used close to surfaces, so adjust accordingly. Additionally, install dimmer switches to adjust brightness easily and achieve the perfect ambiance without moving fixtures again. It is also wise to check the tools required before fitting the new unit. For a complete guide on mounting lights directly under cabinets, refer to our DIY Under Cabinet Lighting article for material lists and build steps. This method helps you create balanced lighting with confidence, eliminating guesswork.
Three Wall-Distance Mistakes That Ruin a Room
Placing lights too close or too far from the wall can ruin your room’s ambiance. Keep your fixtures at least 18 inches away from the wall to prevent harsh scalloping that washes out decorative accents and distorts color schemes. On the other hand, pushing lights more than 3 feet from the wall creates a shaded perimeter, making the room feel smaller and your walls look unlit and flat.
Additionally, always coordinate wall distance with fixture spacing. For example, if your lights are installed 6 feet apart, position the first row about 3 feet from the wall. Ignoring this rule causes uneven lighting, leading to glare, dark zones, or bands of inconsistent brightness. Paying attention to these details ensures your lighting enhances the room’s balance and visual comfort.
Measure Your Ceiling First for the Right Wall Distance
First, measure your ceiling height before deciding on the wall distance for your lighting. This measurement establishes the foundation for your entire layout. For general lighting placement, divide your ceiling height by two. For example, a 12-foot ceiling typically places the first row about 6 feet from the wall, while an 8-foot ceiling sets it roughly 4 feet away. Higher ceilings require a wider setback to maintain visual balance and ensure even light coverage. Always measure from the finished wall face, not from the stud line, because trim and built-ins can shift the usable surface. Mark your light’s target plane to accurately determine the distance. Pair this measurement with your fixture spacing—many designs set the spacing at half the wall gap—to achieve a balanced and precise lighting setup right from the start.